Darkroom Experiments
What is a photogram?
A photogram is a print made without a camera in which objects are placed directly onto photographic paper (or any other light-sensitive material) and then exposed to light from above. The result is a negative shadow image varying in tone, depending on the transparency of the objects used (areas of the paper that have received no light appear white). Transparent objects and objects with interesting silhouettes are the most effective subjects to use.
The Darkroom
The darkroom is used to print photos on the traditional way. It is kept completely dark (apart from the red 'safe light') so as not to expose any of the light-sensitive materials being handles to the light prematurely. In the darkroom, various pieces of equipment are needed to produce the image, including darkroom chemistry.
|
Enlarger
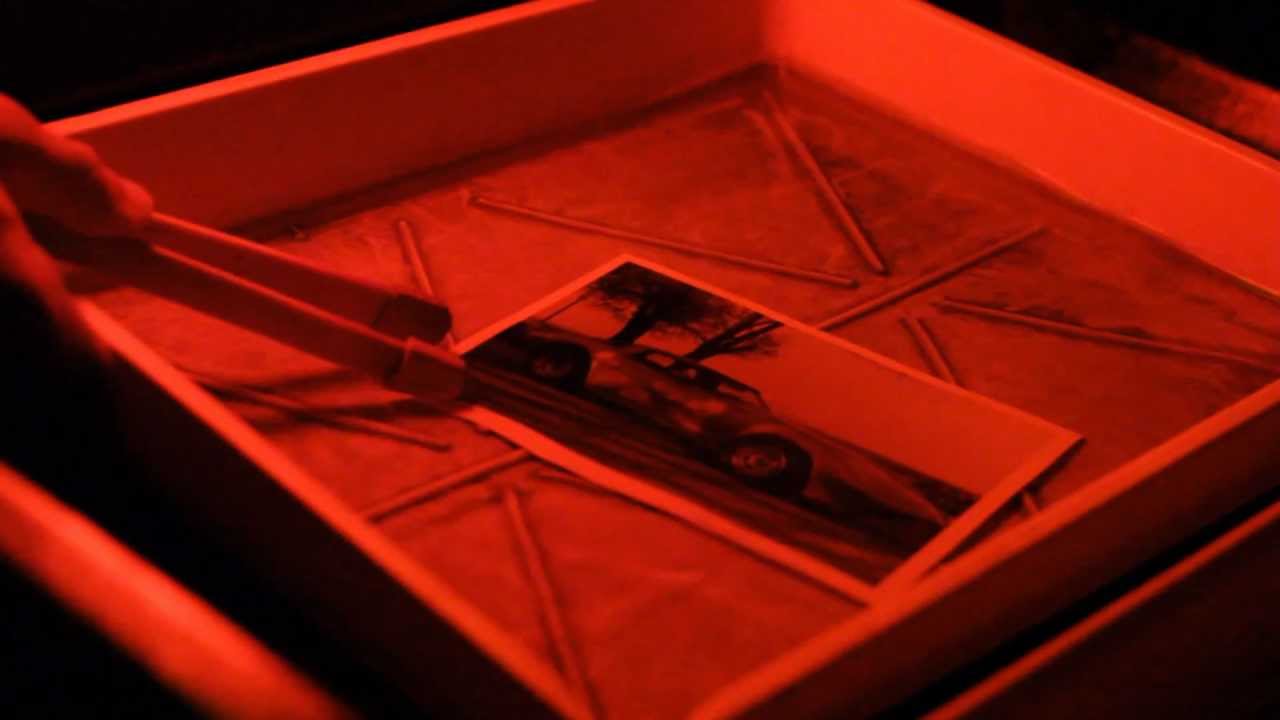
This is a specialised projector - it projects the image onto photographic paper and enlarges it. Safe Light The darkroom is kept completely dark apart from a red 'safe light'. As most darkroom papers are orthochromatic (are partially blind to red light), it does not matter is the photographic paper is exposed to it. Darkroom Trays These trays are used for holding the chemicals used in the developer, stop and fix in which the prints are left for varying amounts of time. Print Tongs These are used to transfer the print from the developer tray, to the stop bath, to the fix and finally to be rinsed. It is important to remember not to press on the developing print with the tongs as this can lead to scratches appearing later on. Using tongs is preferable to handling the prints it reduces the risk of marks and blemishes damaging the image, and as chemicals are being used. You should keep each pair of tongs assigned to each tray to prevent contamination across stages. |


|
|
Photographic Paper
Photographic paper is paper coated with a light-sensitive chemical formula and is used for making photographic prints in the darkroom. The shiny surface must be placed facing upwards so that the shadow of the negative can be projected. Developer The first aspect of darkroom chemistry that is used is the developer. This causes the image to appear. Although the image may appear within seconds, it is imperative to leave the print here for two minutes. Stop Bath The darkroom chemistry continues here - the stop bath stops the developing process. Prints should be left in here for 30 seconds. Fix This 'fixes' the film so that it is no longer sensitive to the light. Prints should be left in here for one minute. Sink The sink is the final phase in developing the images. It contains a running tap and water bath in order to rinse off any chemical residue from the print, so that it is ready for the dryer. |
Test Strip and Print
What is a test strip?
A test strip is a print made before any other prints are made to check for the optimum aperture and exposure time. It's important to create a test strip to ensure that your prints don't turn out over-exposed (in which no details can be seen) or under-exposed (in which everything is too faint).
How do you make a test strip?
After ensuring that there is a negative in the enlarger, you place the piece of photographic paper (matte side down) underneath. After putting the filter over the over-head light, you turn on the light in order to see where to place your objects onto the paper (the filter ensures that the photographic paper isn't exposed to the light and ruined). You then turn the light off and place a piece of matte black paper over your photographic paper so that it covers around 3/4 of it. Once you have removed the filter and pressed the button to start the enlarger's timer, at each second you move the black paper down a quarter until all of the photographic paper is fully exposed to the projector's light. This therefore shows the difference in appearance of the print when exposed to light for a different number of seconds.
|
Creating a print
To create a print, you place the photographic paper below the enlarger and, after putting the filter over the light, turn on the light. I tried to place my objects onto the paper in interesting compositions and I found that the use of block, solid objects alongside more intricately detailed ones created the most engaging prints. You then set the enlarger's timer to the number of seconds that proved the most effective on the test strip (for me, this was three seconds) and turn off the light. After removing the filter, you start the timer. You then begin the process of developing the print using the darkroom chemicals - using the developer, then fix, stop bath and finally rinsing it and transferring the print from each tray using three different sets of tongs. |

|
Processes
Painting on developer |
Double exposure |
|
For this first process, after I had gone through the usual steps of exposing the photographic paper to the light, I used a small paintbrush to paint on the developer. Then I continued the process of the fix, stop bath and rinsing. This meant that only the areas that I had painted onto the print developed, creating an artistic image.
|
For this process, I began experimenting by dimming the brightness of the enlarger's light and increasing the exposure time on the timer so that I would have enough time to move my objects between seconds without over-exposing my print. Initally, I used a time of four seconds (two second increments), moving the objects a small amount between these. This achieved the combination of translucent, faint shapes alongside bolder, white shapes, depending on which objects moved and by how much. I tried this process again but with a dimmer light and a longer exposure time (six seconds, so three two second increments). This allowed me to move the objects three times, so that three different tones were shown (bold, fainter and faintest). Although this was interesting and gave an almost ghostly effect, I felt that the first print was more successful.
|

|

|

|
Sandwich print |
Solarising |
|
For this inversion process, I produced a print as usual. After drying it, I put another piece of photographic paper over so that the printed side was face-to-face with the shiny side of the paper with a sheet of glass over to compress the two prints. I then exposed it to the enlarger's light and used the darkroom chemistry as usual. Don't forget to create a test strip - you will need longer than a usual photogram. Have your aperture on f2.8 and f4.
|
For this process, I exposed the photographic paper to light for three seconds, as usual. However, once I placed it into the developer, I removed it again after 10 seconds (just as the image was starting to appear). I placed the print into a new tray and then re-exposed it to the light, then developed it normally.
|

|

|
Selfies
The Selfie
|
In this task, I was required to experiment with the idea of a 'selfie', to look at famous examples of self-portraits in art and photography and to use these to help to create my own examples. The current obsession with photographic self-portraits ('The Selfie') can be traced back to the origins of photography. One of the first things photographers did when they learned how to fix light on a surface was to turn their rudimentary cameras on themselves. The earliest known example comes from 1839, the same year that Louis Dageurre patented the 'invention' of photography as a commercially viable process. Since then, the self-portrait, a genre inherited from painting, has become a staple form of photographic image making.
Selfie is slang for self-portrait. It is used today to infer a photographic self-portrait taken on a mobile device and shared via social media. In 2013, 'selfie' was word of the year in the Oxford English Dictionary. The inclusion of front facing cameras on smart phones and the popularity of social media sites like Instagram and Snapchat have made the posting of selfies increasing popular as a form of photographic self-expression.
The 'selfie' accounts for a large proportion of the digital photographs people make. According to a recent survey, 24 billion selfies were uploaded to the Internet last year (2016). |
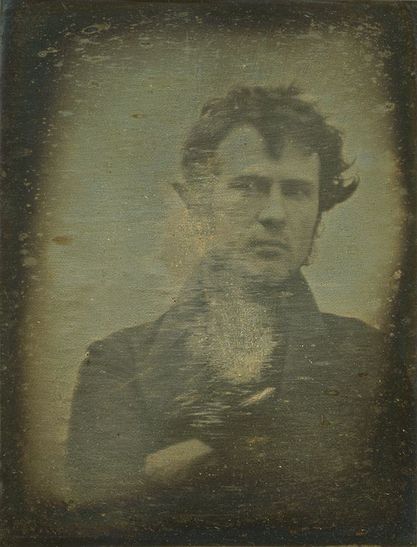
Robert Corneluis' Self Portrait: The First Ever 'Selfie' (1839)
|
Fashion photographer Rankin, told BBC Radio 5 about his worries over selfie culture. He discussed how, in his personal experience, you can become easily 'obsessed' with taking selfies and remain in self-denial. He encouraged people, espcially young people, to try to look beyond the surface of these images of 'perfection'. He also brings up how you can easily create a version of you that doesn't reflect reality. He argues that portraiture was before a medium in which people's uniqueness and personality could be showcased, but that this has been soiled by selfie culture which encourgas people to start 'comparing yourself to yourself'.
|
This idea of an alternate reality that can be created by the use of selfies is explored by the photographer Amalia Ulman. Ulman began to act out the story of a fictious alter ego on her instagram account by posting images on her feed. Followers liked and commented, unaware that this was all a manipulated show. Henry Carrol in the book 'Photographers on Photography' wrote that 'Ulman's work reveals a disturbing truth ... by taking selfies and sharing them online, photography has given us what we all yearn for: an identity ... that isn't ours'. He goes on to comment that 'photography has turned us all into marketers - and the product being sold is ourselves'.
|
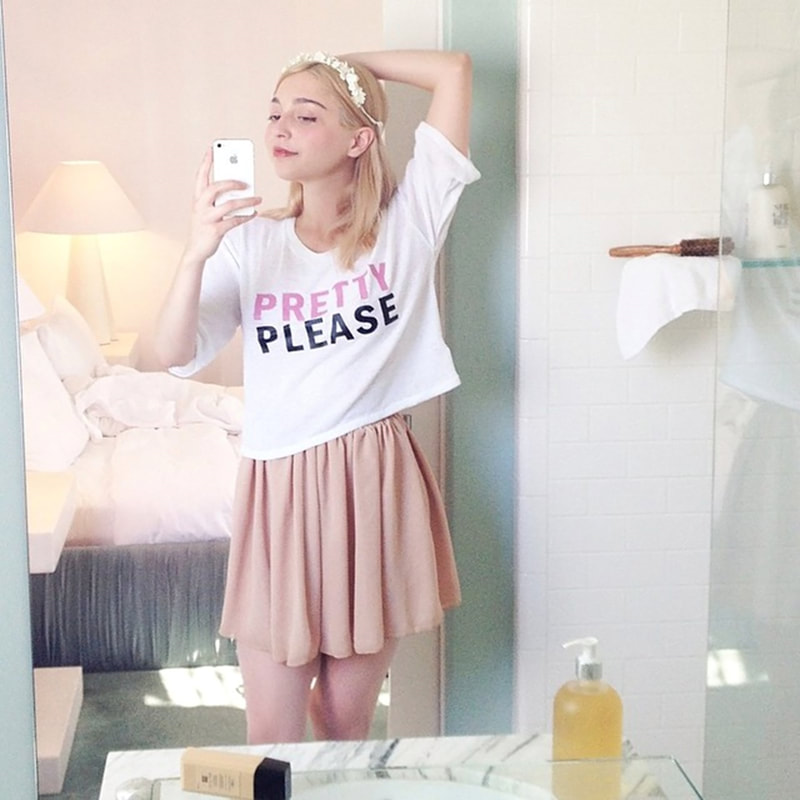
Instagram Upload, 2014 from the works 'Excellences & Perfections'
|
Personal Response
1. How many selfies do you take a week? What do you do with them?
Personally, I probably take 5 selfies a week. I mainly take photos with friends so that I have an easily accesible way of rembering and cataloguing events. Sometimes I will upload these to social media networks like Instagram, but usually they are for my own safe-keeping.
2. What, do you think, is the reason why taking selfies has become so popular? Is there a downside to the taking and sharing of selfies? I think it is mainly due to the accessibility of phones with front cameras - everyone with a smartphone is able to take seflies. The increasing use of social media networks also constributes - people seem to feel a growing need to share themselves online. The act of taking a photo and sharing it has become banal through the massive influx of photos that we see everyday - on advertisements, on social media, on television and more. This maybe cheapens the act of caputuring a moment in a way as so many selfies are taken and so many are shared, the sacredness of putting your hope into only taking a singular photo in a sinuglar second is dismissed. The sharing of selfies may also damage peoples ideas of their self-image as selfies can only convey a surface, vague idea of a person rather than a real one. Whether it is intended or not, uploading selfies makes us into two-dimensional 'characters' as the images only show one side to the story.
3. What are the rules or conventions for taking a selfie? Where do these come from? Is it ok to break these rules? There are possibly conventions that most people follow when taking selfies for the purpose of social media - to smile and to look happy to project an idealistic image. However, I think that one of the main unique features of the selfie is that it is meant to be casual, so it may be one of the most flexible form of self-portrait.
The Reflected Selfie
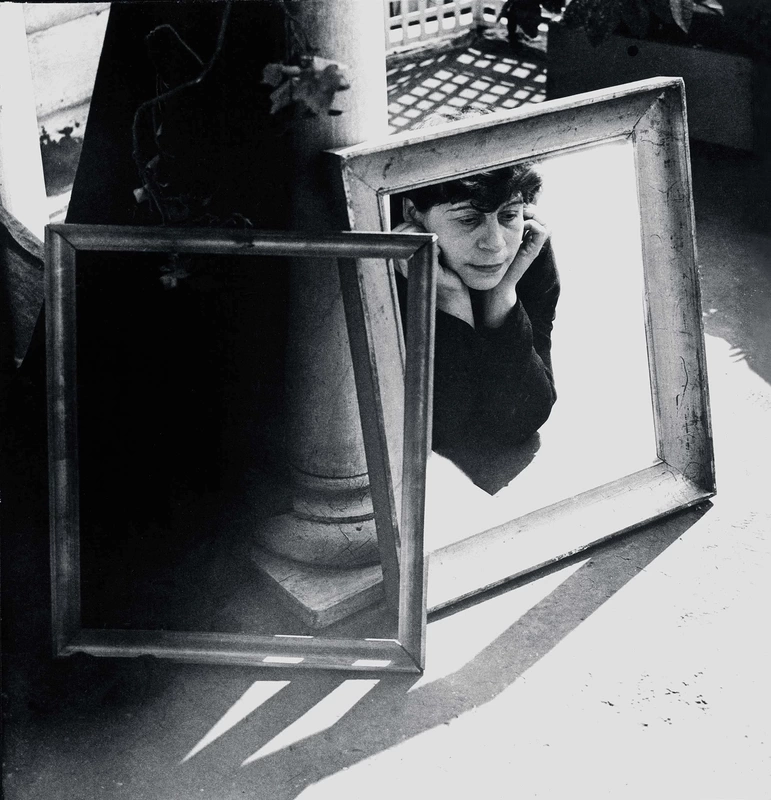
Florence Henri
'I want ... to compose the photograph as I do with painting. Volumes, lines, shadows and light have to obey my will ... this happens under the strict control of composition, since I do not pretend to explain the world nor my thoughts'
Florence Henri began her experimentations in the arts through the form of abstract painting, but decided to switch mediums to photography after studying at the Bauhaus in Germany as she belived it was the medium of the future. She had been earlier influenced by studying painting in Berlin, where she was exposed to abstract and post-expressionist art.
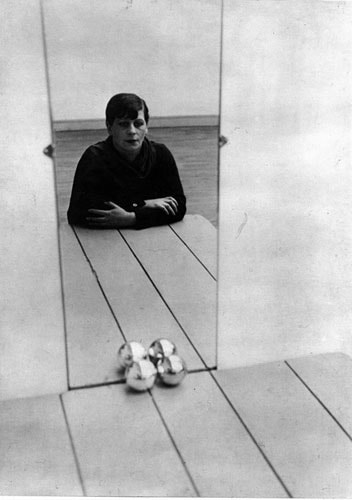
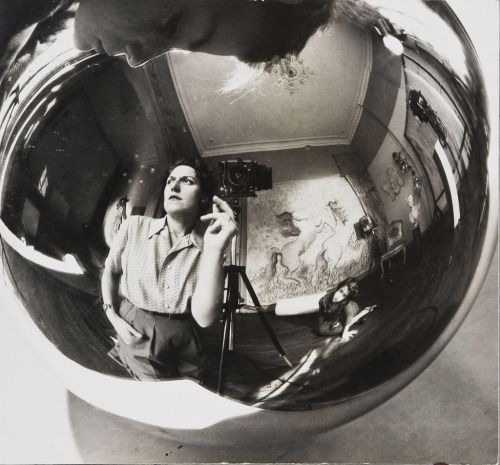
She is best known for her experimentations using mirrors. She decided to use mirrors in order to add her own reflections to her images, and being influenced by Constructivism and Cubism, the harsh lines and interesting shapes that the form of a mirror could add. The spatial ambiguity that ensued through her use of mirrors adds to the surreal quality of her photos. As she developed her ideas, she began to use intrustrial materials like metal and wood to create multiple perspectives and viewpoints. This led to her decision to use metal spheres in probably her most iconic self-portrait, which became a modernist landmark.
She is best known for her experimentations using mirrors. She decided to use mirrors in order to add her own reflections to her images, and being influenced by Constructivism and Cubism, the harsh lines and interesting shapes that the form of a mirror could add. The spatial ambiguity that ensued through her use of mirrors adds to the surreal quality of her photos. As she developed her ideas, she began to use intrustrial materials like metal and wood to create multiple perspectives and viewpoints. This led to her decision to use metal spheres in probably her most iconic self-portrait, which became a modernist landmark.
|
|
|
|
|
|

|
|
I think that the most successful photos were the ones where I used a hand-held mirror and tried to create interesting shapes within the frame by hiding the camera, as Florence Henri does in some of her self-portraits. I found that this gave me more creative freedom to establish some abstraction in the images, which is sometimes hard to achieve through the most literal medium of photography, as Henri tried to introduce her training in painting into her photos. The photos in the mirror sphere gave an intruging new perspective and an other-wordly quality as things within frame were stretched out of proportion. However, I found it difficult to focus the lens on the reflective surface, meaning that the images themselves are not as clear as I would've hoped. For all of the images, I used a tripod to minimise movement and aritifical lighting to exaggerate or spotlight myself, to put the 'self' more clearly in 'self-portrait'.
The Obscured Selfie
Richard Hamilton
'Computer-generated images lack the smell of turpentine and the touch of a bristle brush - they can look clinical, artificial, or gaudy'.
Richard Hamilton was a member of the Independent Group, formed in the 1950s by a group of artists and writers, who contributed to the development of the Pop Art movement in Britain. His work, which contines to be influential now, draws from and comments on popular culture, technology and current events. Hamilton was keen to embrace certain types of new technology in his art, so began creating computer-generated works in the 1980s, from which he had a long career as a print-maker.
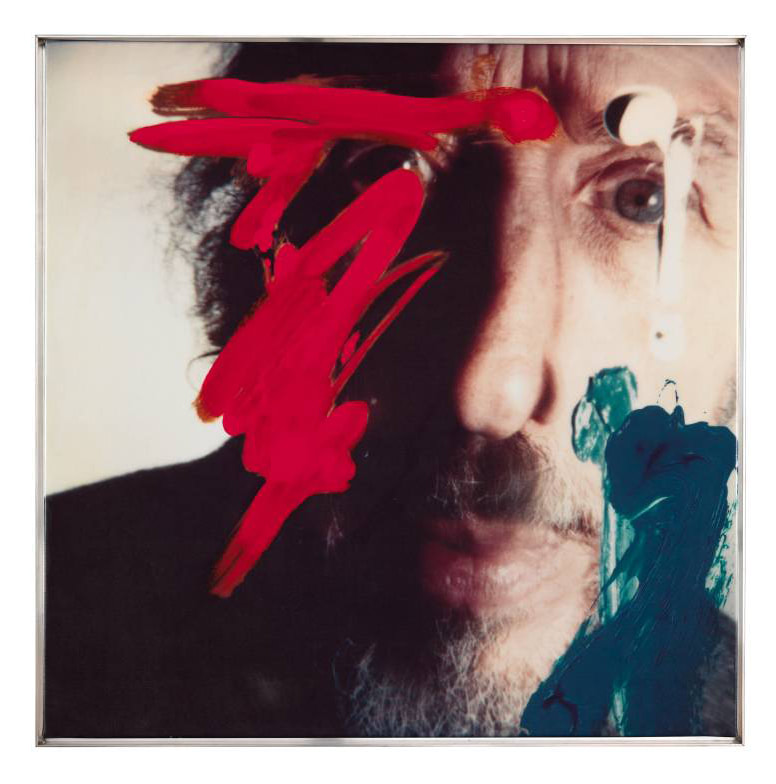
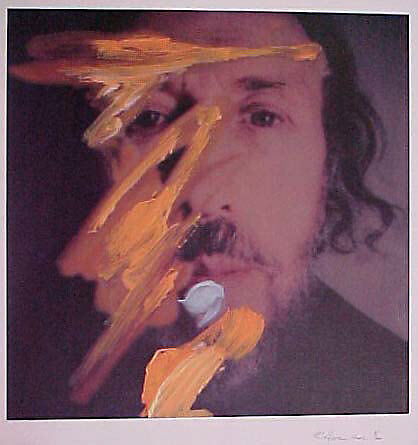
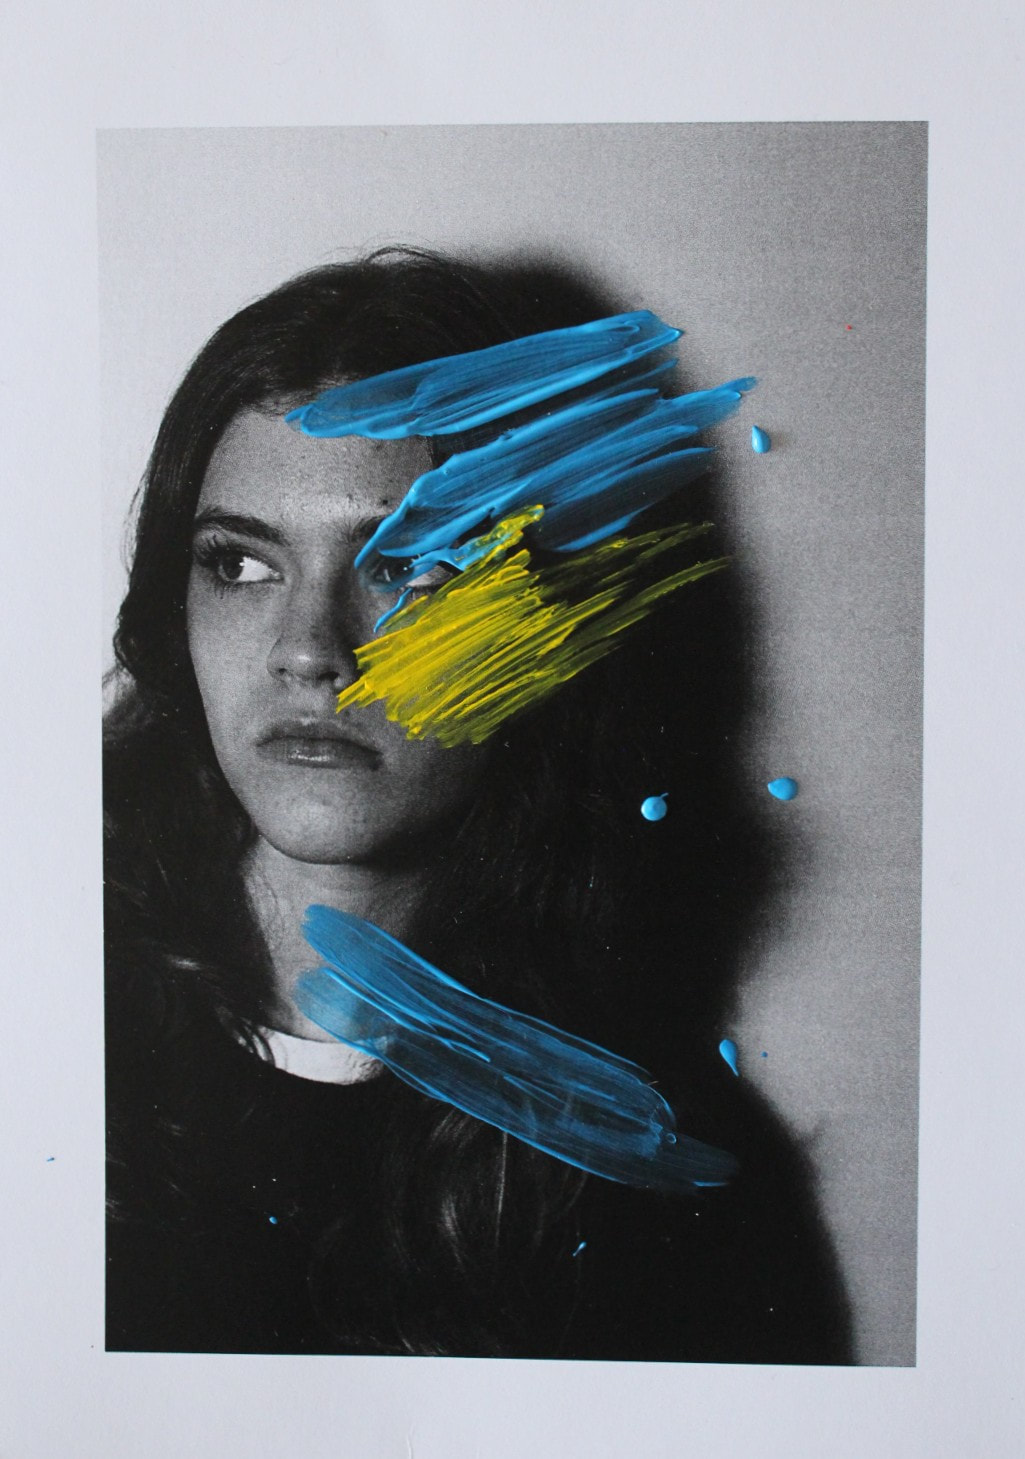
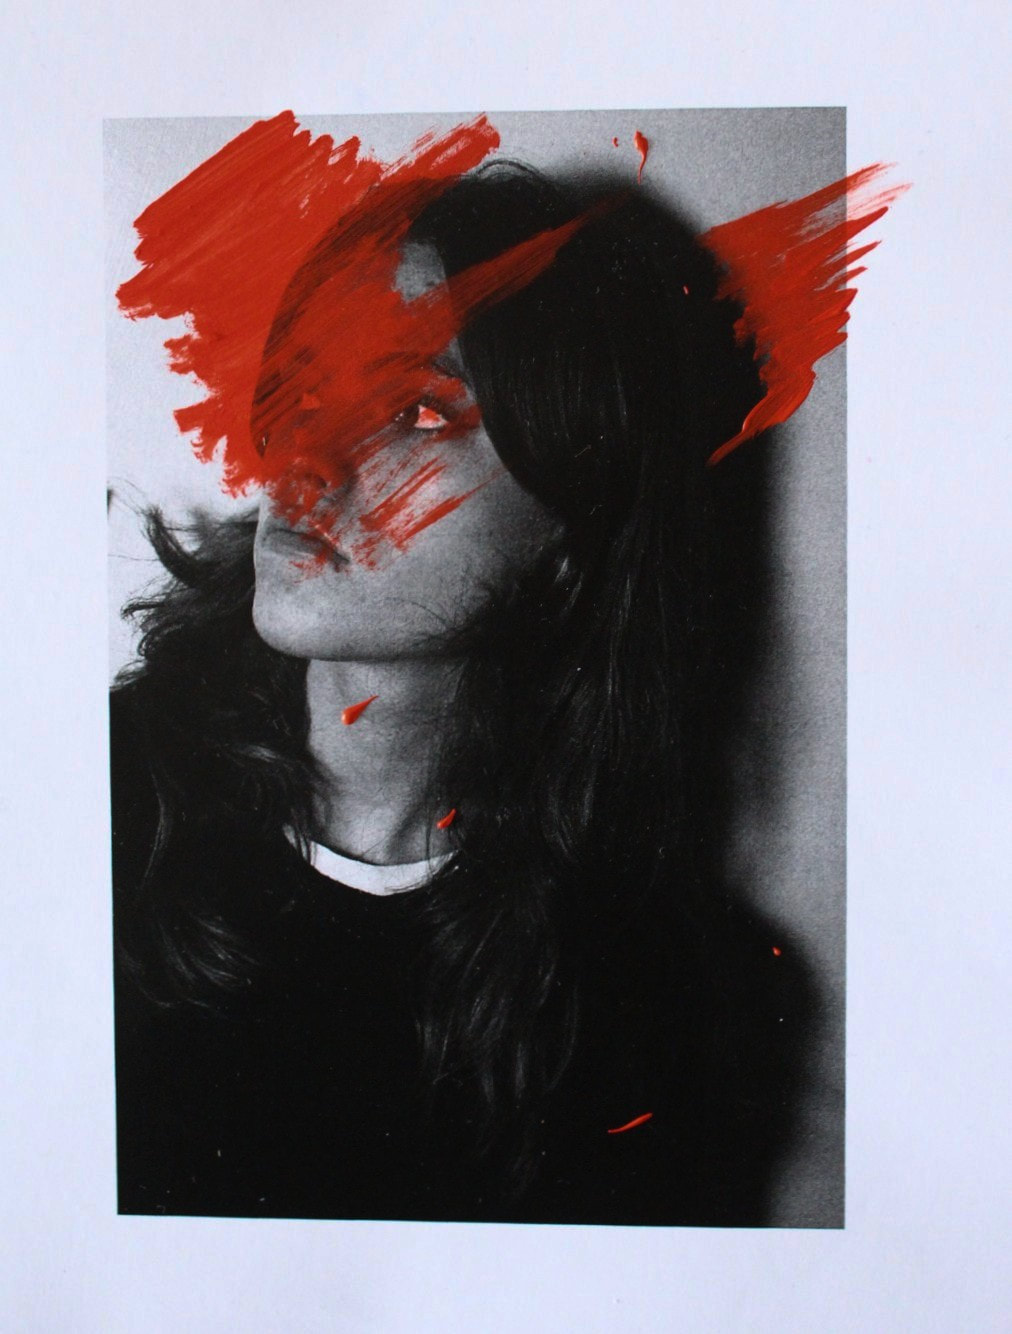
He went on to create a set of partially obscured self-portraits titled 'Four Self Portraits 05.3.81'. This series blends the traditional conventions of portraiture with experimental new techniques. The images are polaroids taken by people Hamilton knew, creating a composite self-portrait which spanned over multiple years. He went on to take a further 20 polaroids of his face behind a sheet of glass, going on to add layers of thick acrylic paint, mixing mediums. He went on to return to the project several times, this time using computers. He scanned, enlarged and retouched the portraits using Quantel Paintbox, a dedicated computer graphics workstation used for the composition of graphics. So nearly ten years after taking the polaroids, the new artworks were displayed. This complex, layered process of working shows Hamilton's ideas about the progression of the means of making artistic media. He has commented that he wishes to bring some of the basic paint techniques back into this modern sphere of art.
He went on to create a set of partially obscured self-portraits titled 'Four Self Portraits 05.3.81'. This series blends the traditional conventions of portraiture with experimental new techniques. The images are polaroids taken by people Hamilton knew, creating a composite self-portrait which spanned over multiple years. He went on to take a further 20 polaroids of his face behind a sheet of glass, going on to add layers of thick acrylic paint, mixing mediums. He went on to return to the project several times, this time using computers. He scanned, enlarged and retouched the portraits using Quantel Paintbox, a dedicated computer graphics workstation used for the composition of graphics. So nearly ten years after taking the polaroids, the new artworks were displayed. This complex, layered process of working shows Hamilton's ideas about the progression of the means of making artistic media. He has commented that he wishes to bring some of the basic paint techniques back into this modern sphere of art.

|
|
|
|
|
I think my response was successful in re-creating Hamilton's work and using his idea of combining both traditional and newer techniques. I took the photos on a DSLR camera and then printed them onto card so that I could paint onto them. The paints I used were water-based acrylics which I found effective as I could apply it heavily or sparingly to give it that almost distressed look. I also liked the combination of the black and white image with the vibrantly coloured paint strokes as it reflected Hamiton's intentions - it is almost like I am physically bring back the colour to these old techniques by using them in combination with new ones. I also got the experience of 'layering' techniques as this was Hamilton's way of working - the initial photographing, then digital editing in Photoshop, then printing, then re-photographing and final editing felt like the journey that I was meant to be put through to fully appreciate what Hamilton's work means.
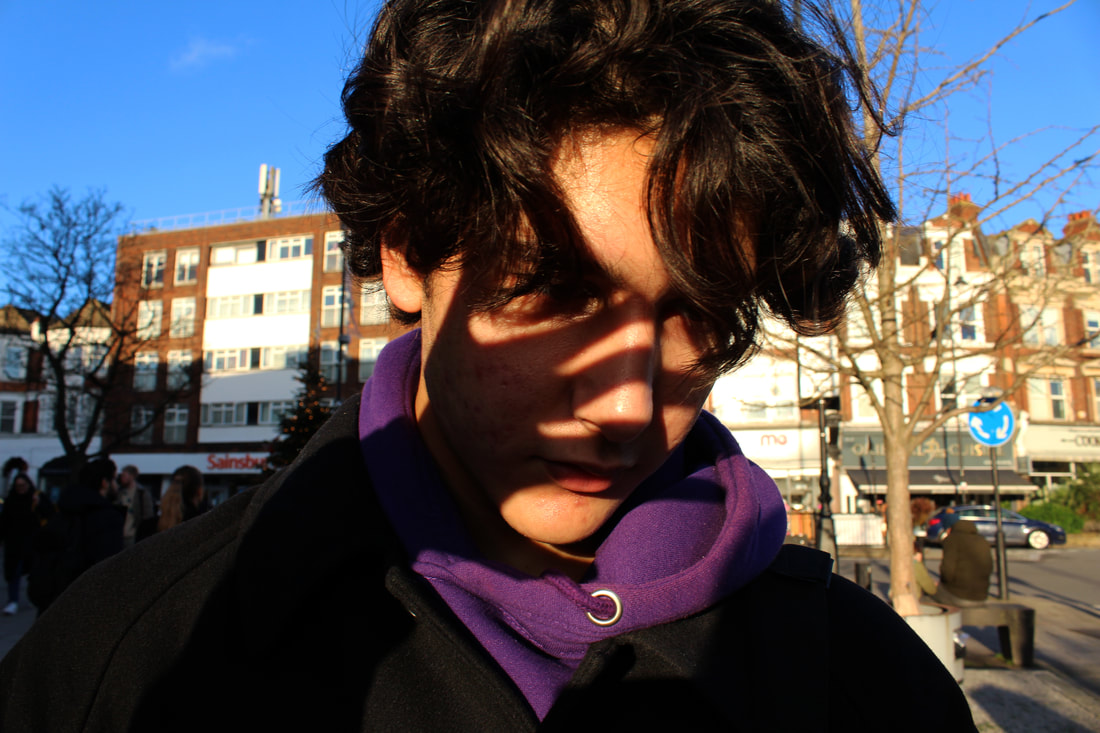
The Shadow Selfie
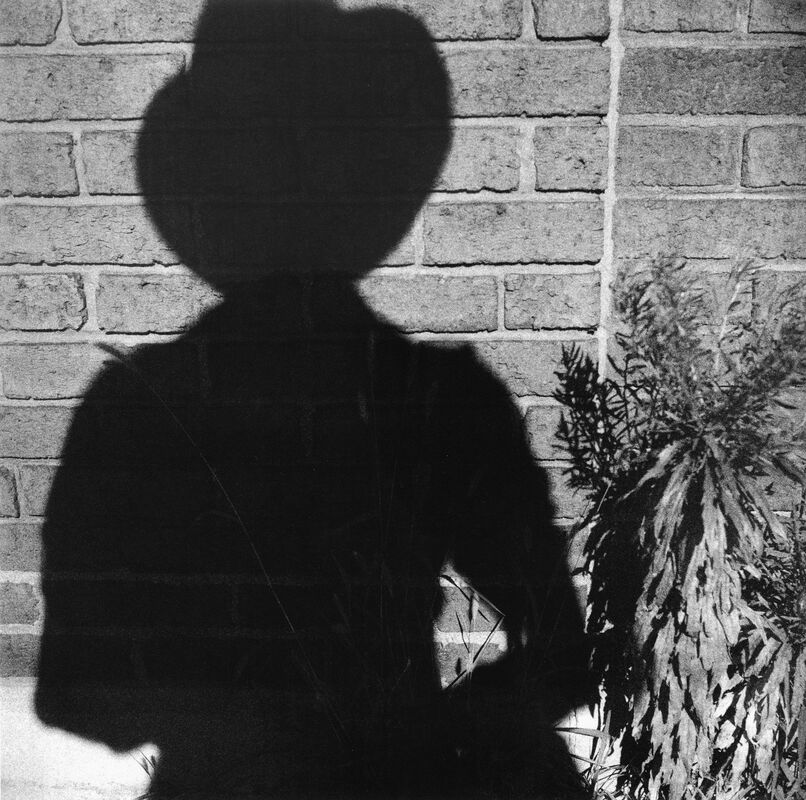
Vivian Maier
'Well I suppose nothing is meant to last forever. We have to make room for other people. It's a wheel.'
Vivian Maier was an American street photographer born in New York City, however she spent the majority of her youth in France. Maier only explored photography during her leisure time as she took up work as a full-time caregiver when she returned to America in 1951. She began to create quite a collection as she consistently took photos for 50 years, resulting in an impressive number of over 100,000 negatives. In 1956, Maier moved to Chicago and enjoyed the luxury of being able to use a darkroom, which allowed her to process her prints and develop rolls of B&W film. Maier later switched to colour photography, using various German SLR cameras. This colour work was more abstract and began to feature people less and less. Unfortunately, Maier has only recently been revealed as a very significant photographer of the 20th century, when her belongings were put up for auction in 2007.
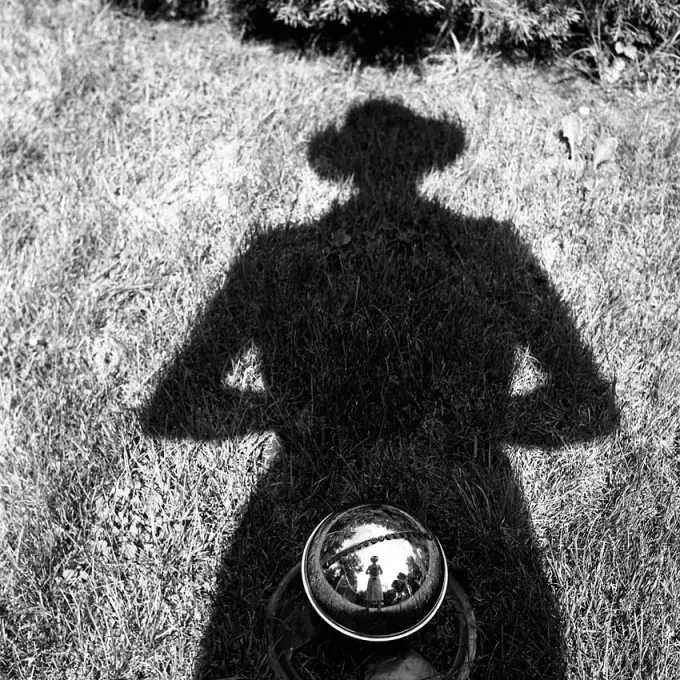
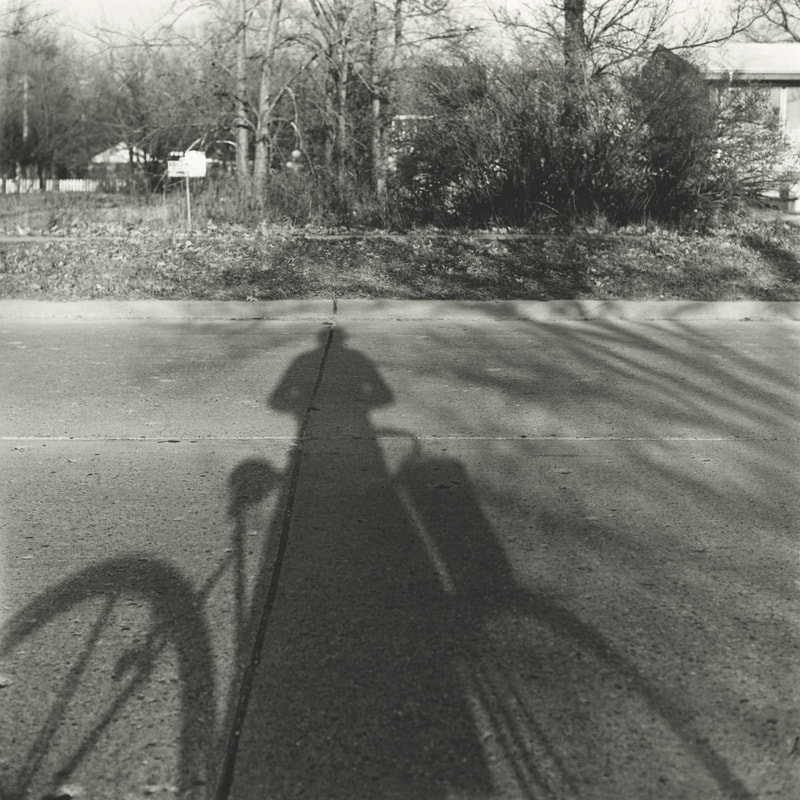
Maier's work reveals her particular fascination for recording everyday life, especially on the streets of Chicago and New York. She photographed an impressively wide range of subjects - from carefree children and glamorous housewives to the homeless and destitute, encompassing the highs and lows of the everyday. Her street photography included shop fronts, arcades and aerial shots. We as the viewers can catch a glimpse into Maier's perspective on America - her photos bring a certain intimate humanity and at times humour to what could be mundane. Contrastingly, Maier's use of reflections in mirrors, windows and her playfulness with regards to shadow add a surreal aspect, like what we see here in her shadow self-portraits in which perspective is effectively manipulated.
Maier's work reveals her particular fascination for recording everyday life, especially on the streets of Chicago and New York. She photographed an impressively wide range of subjects - from carefree children and glamorous housewives to the homeless and destitute, encompassing the highs and lows of the everyday. Her street photography included shop fronts, arcades and aerial shots. We as the viewers can catch a glimpse into Maier's perspective on America - her photos bring a certain intimate humanity and at times humour to what could be mundane. Contrastingly, Maier's use of reflections in mirrors, windows and her playfulness with regards to shadow add a surreal aspect, like what we see here in her shadow self-portraits in which perspective is effectively manipulated.
|
|
|
|
|
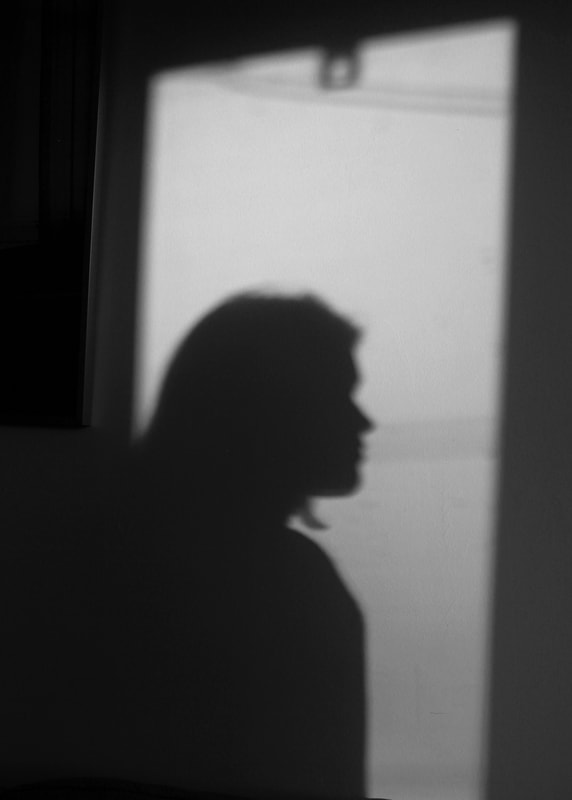
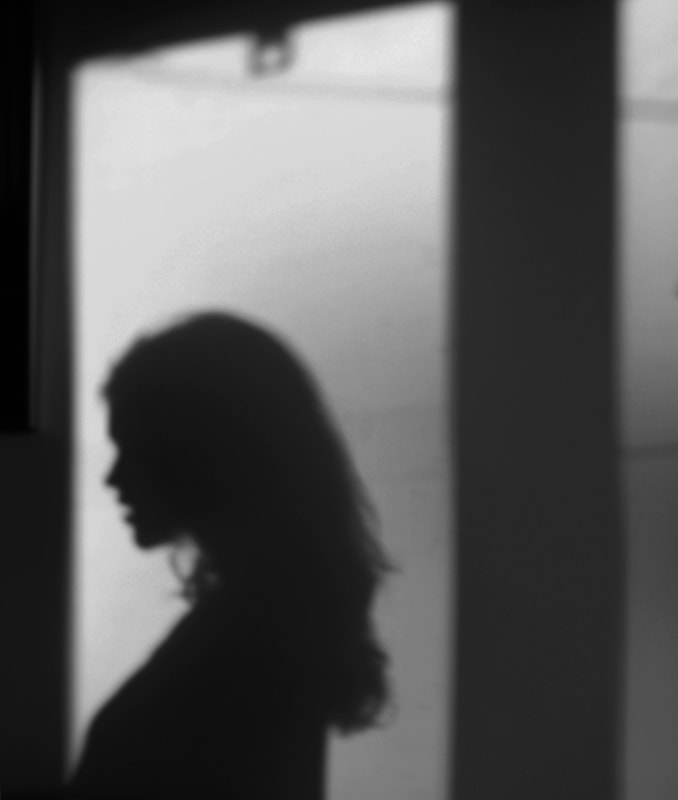
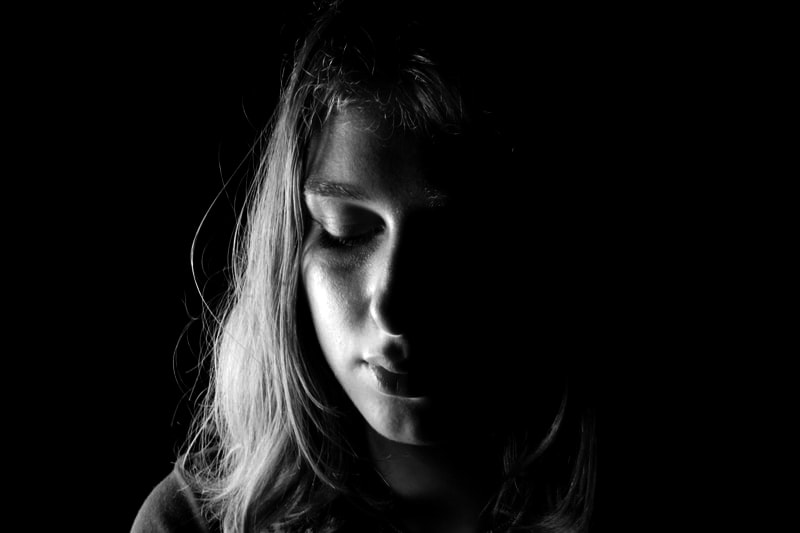
I found that the photos of my profile were the most effective as they had a more complex and defined shape. It was interesting to see myself as a shadow, as this is something we do not usually stop to look at. Maier's exploration of creating her shadow using natural light inspired me to try this myself when the sun was at its most bright. Possibly I could've also tried this using artificial lighting as it might've brought out a stronger and darker shadow, however I found that the hazy softness gave a contemplative feel to the resulting images.
Character Recognition: Myra Greene
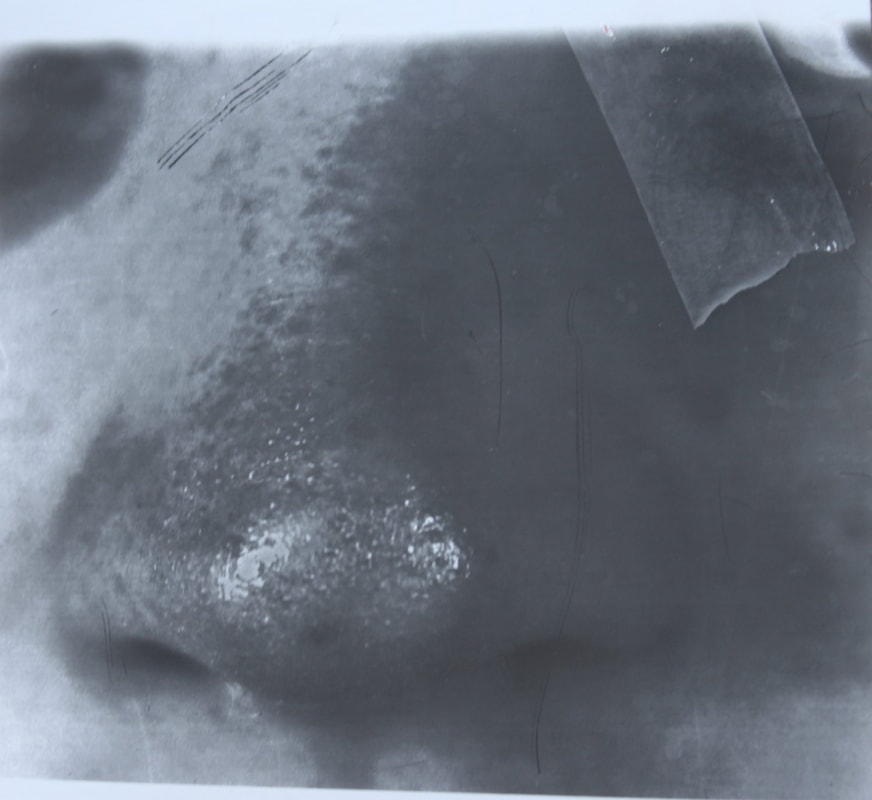
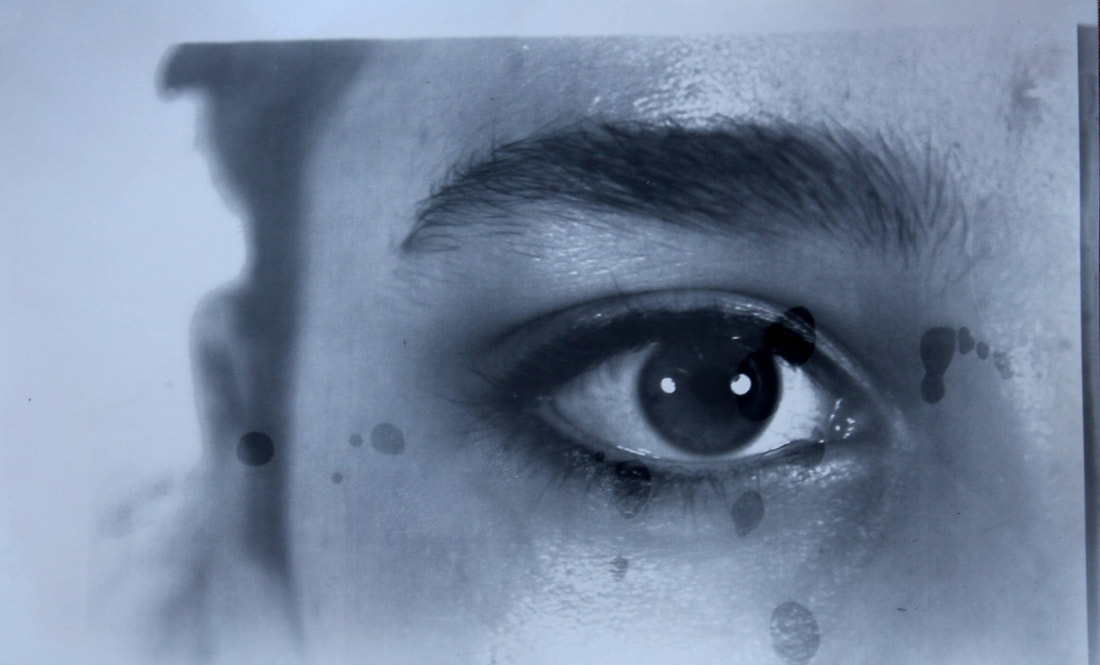
Photographer Myra Greene creates portrait images of herself using traditional photographic processes. In the project 'Character Recognition' she focusses on different parts of her face as a process of recognition and exploration.
|
'Confronted with an up swell of bigotry both personal and public, I was forced to ask myself, what do people see when they look at me. Am I nothing but black? Is that skin tone enough to describe my nature and expectations in life? Do my strong teeth make me a strong worker? Does my character resonate louder than my skin tone? Using a photographic process linked to the times of ethnographic classification, I repeatedly explore my ethnic features in Character Recognition. The lessons learned are haunting and frightening in these modern times.'
|
|
Greene started her work in the summer of 2005, after learning the process of ambrotype, which creates positive photographs on glass made by a variant of the wet place collodion process. Greene was aiming to marry the process that she had learnt with some of the concerns that she had about race and identity. That summer, Hurricane Katrina hit. Greene watched all of the news and popular culture which surrounded the event, and was concerned by the way in which people see or view black people.
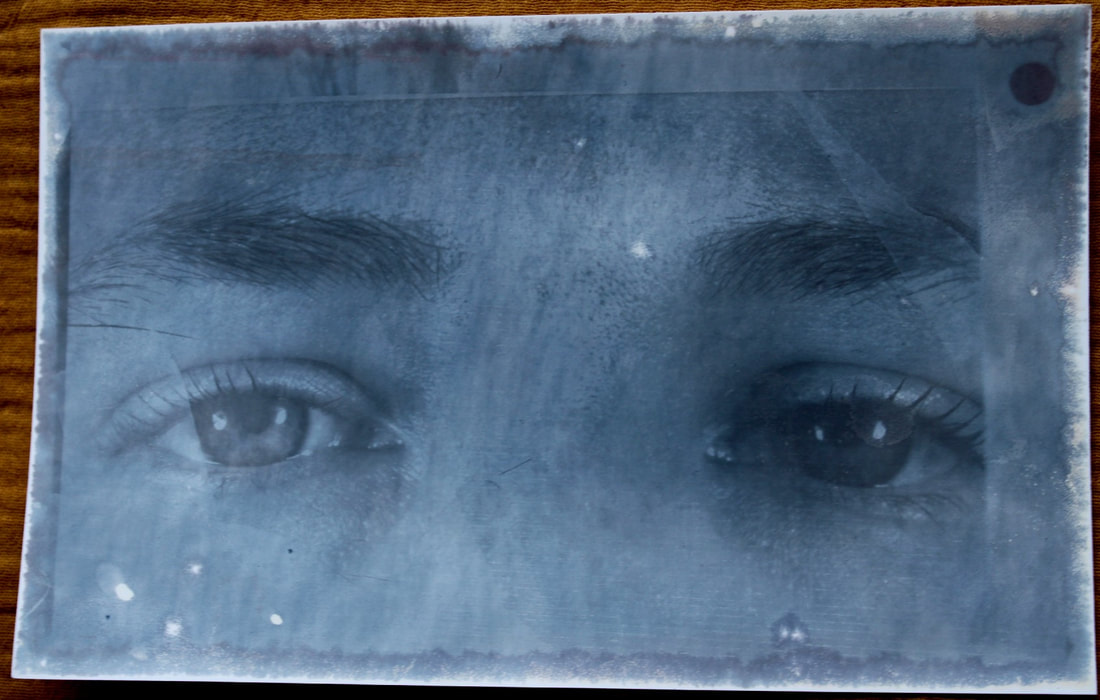
Stylistically, she took the idea of the mugshot - how we look at individual features and married this with the process of producing an ambrotype. She produced 20 images, 3 by 4 inches in size, depicting a variety of facial features, inlcuding the eyes, the ears, the nose, the mouth and the profile. Greene belives that these are the starting points from which you build a racial identity, and those features on which people many begin to judge one's character.
The ambrotype process dates back to the the invention of photography and it was most popular during the 1850s to the 1880s. Greene feels that this process relates heavily to the slave trade and how her skin is recorded. She says that the work 'has a feeling of being both historical in process but contemporary in nature by their installation and their size itself'. She goes on to say: 'I was hoping to marry this antique process with a sort of contemporary look at race'.
For this work, I took a number of pictures of different parts of my family member's face in the style of Myra Greene with the intention of creating a visual representation of the person without showing their full facial portrait.
|
|


(Evaluation here)
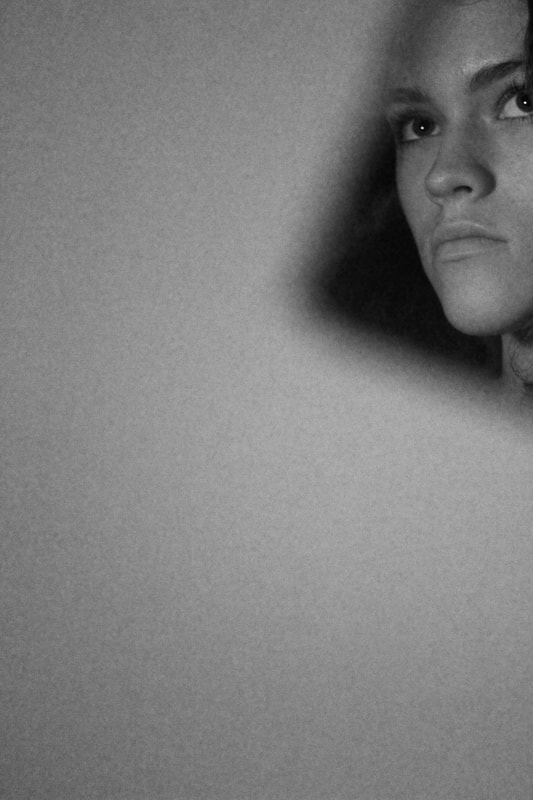
Light and Shadow: Valerie Kabis
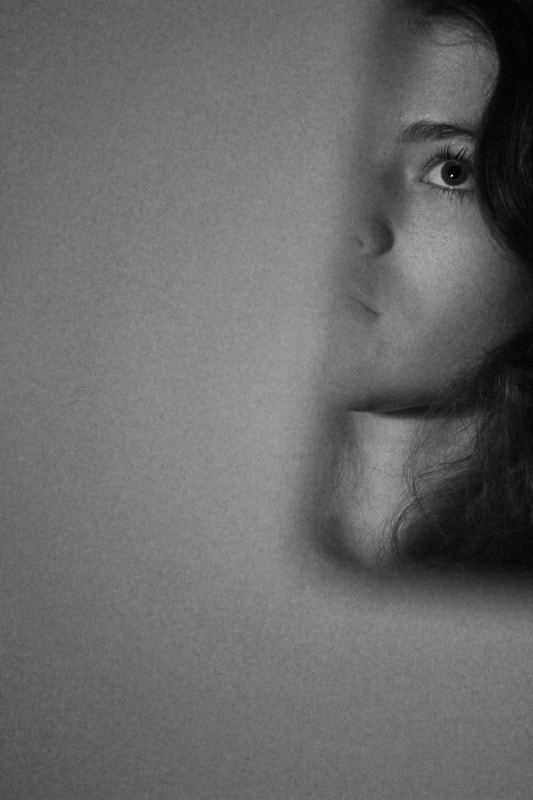
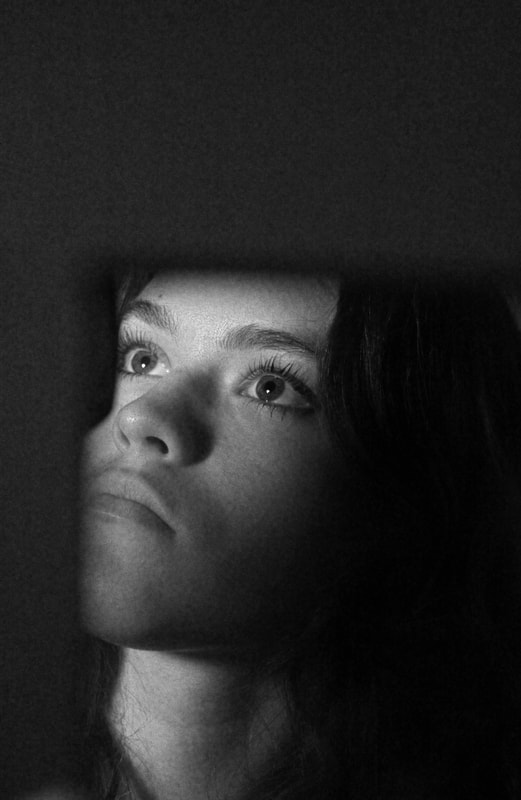
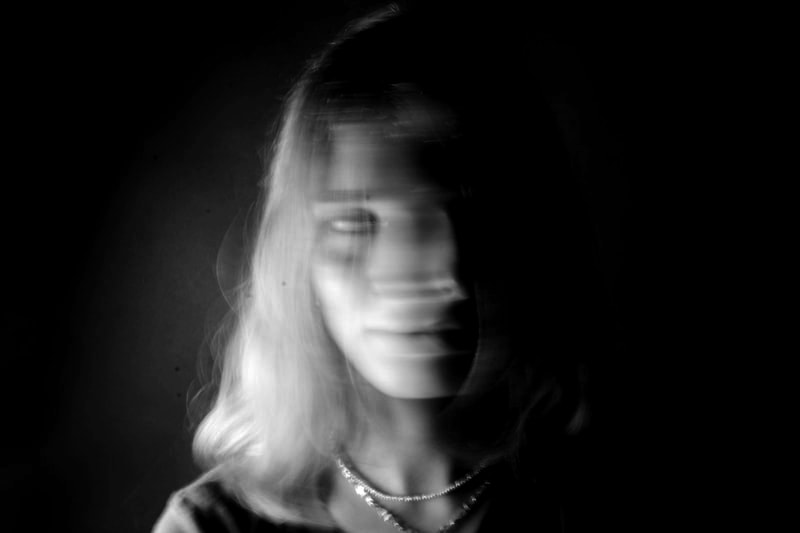
Valerie Kabis is interested in how shapes are created by limiting light. By experimenting with light, shadow and variations in focus, Kabis creates a series of dark and thought provoking images. The series below is called 'Faces'. Through manipulating aperture and at times over-exposing her images, Kabis evokes a sense of deep melancholy. However, this is set up in juxtaposition to the 'excited light quakes' that feature in her works which symbolise glimmers of hope in what Kabis describes as the 'unquiet void' which is the world itself.
Light and Shadow Portrait Variation
Using the works of Kabis for inspiration, I created a series of portraits in the studio. I experimented with different kinds of lighting and effects - for example, using a low shutter speed to create a blurred effect in reaction to my subject's movements. I used studio lighting from all different angles to highlight only certain angles. This sometimes had the effect of distorting the images which made them more suggestive than literal. Overall, I tried to create imaginative and experimental portraits.
On my digital camera, I chose shutter speed priority so that I could manually manipulate this to create my desired effect, beginning with 1/60.
On my digital camera, I chose shutter speed priority so that I could manually manipulate this to create my desired effect, beginning with 1/60.
Edits:

|

|

|
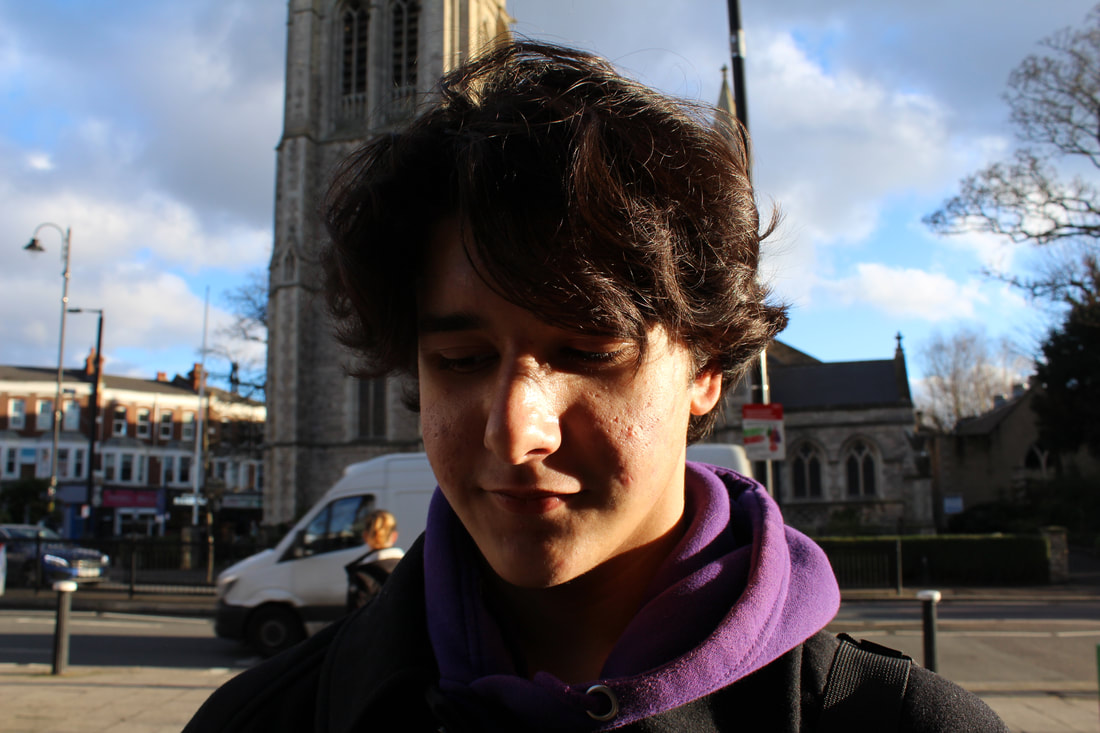
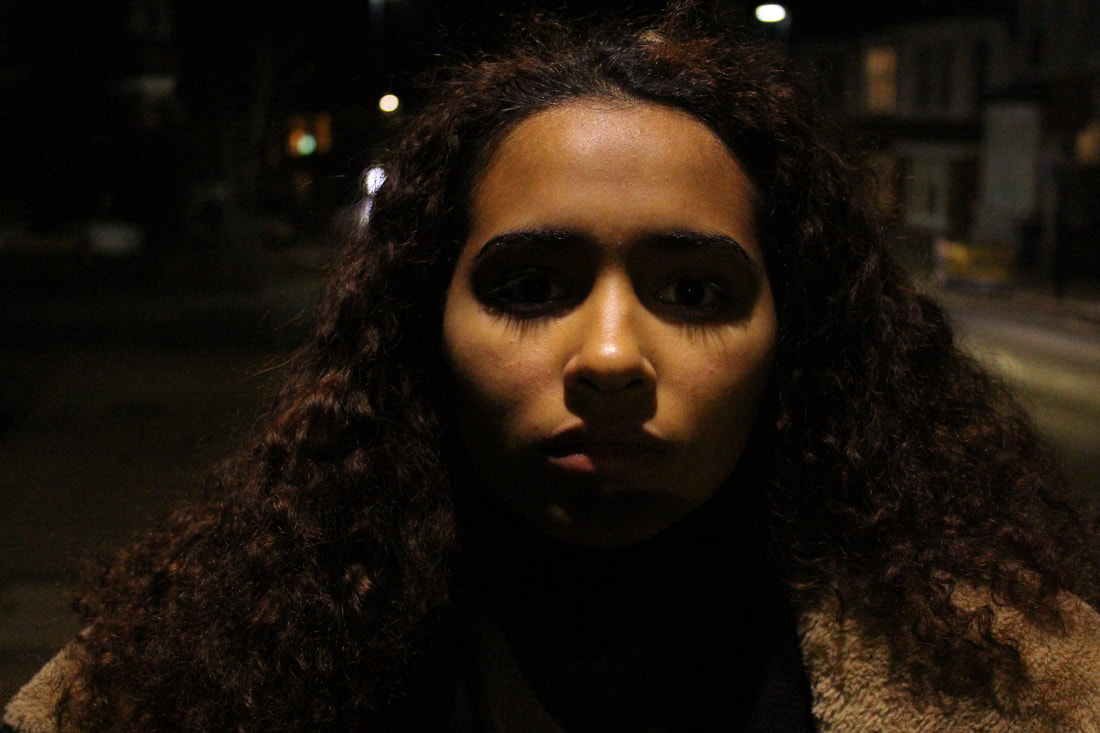
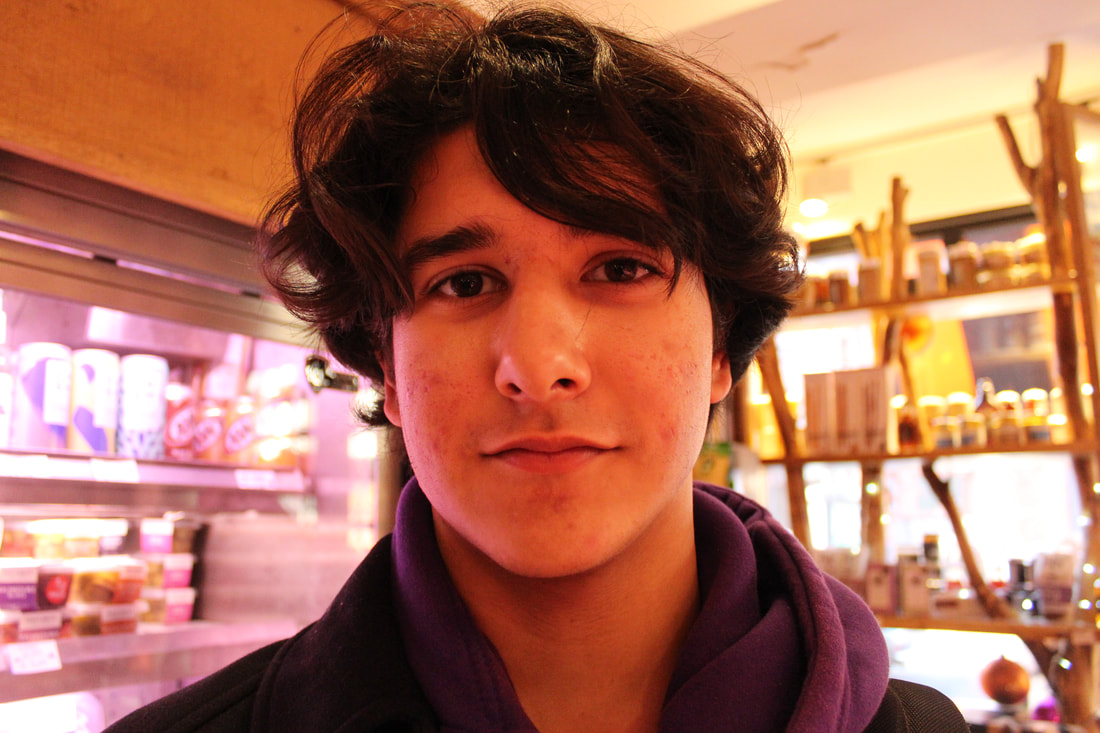
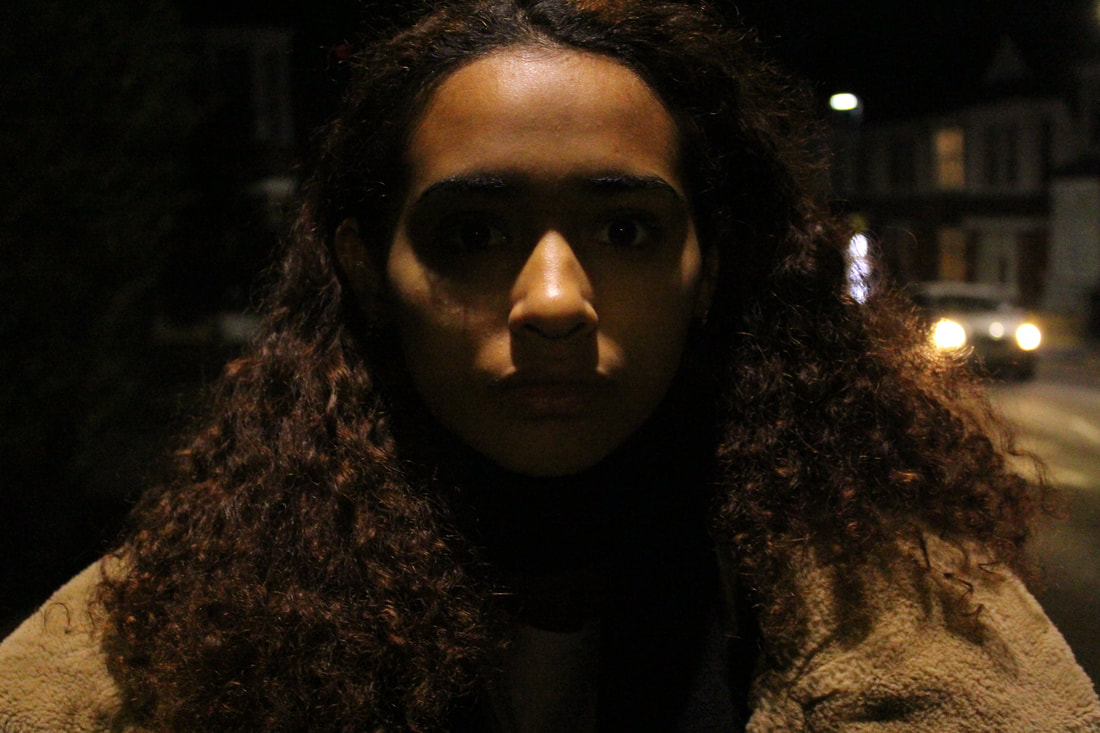
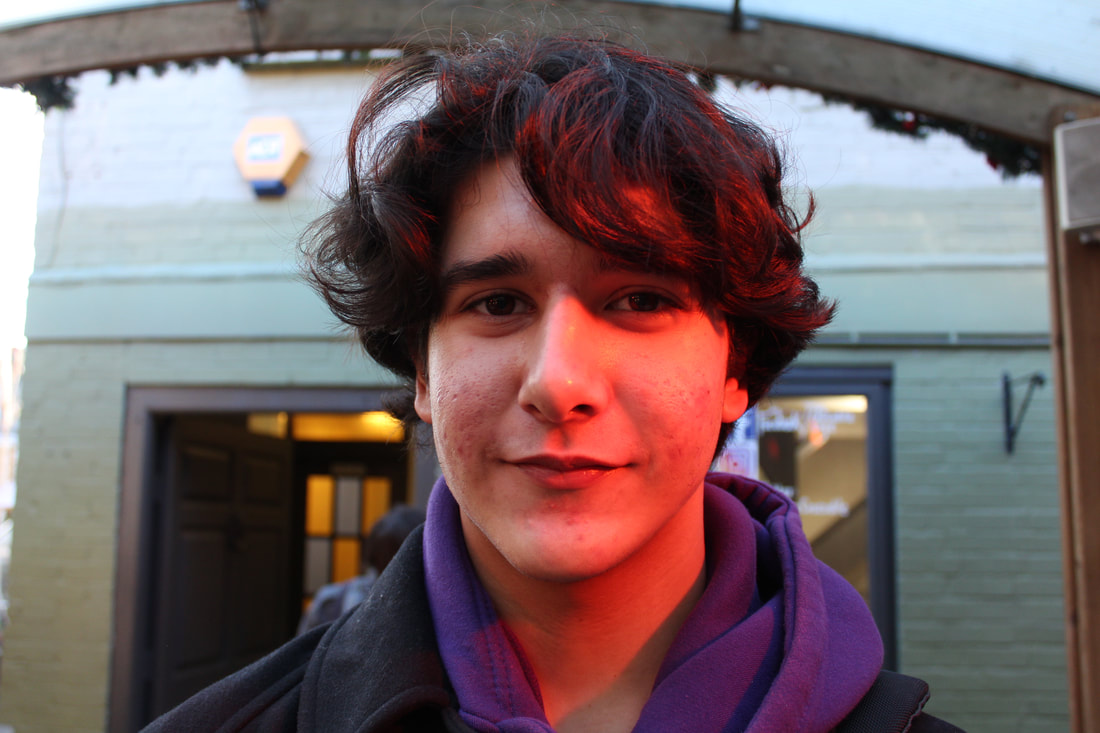
Documentary Portrait
George Town - Lewis Khan
Lewis Khan is a photographer and film-maker born and raised in London, working with stills and motion. Khan has said that from a young age, he was drawn to the tactile and immediate nature of photography, using the camera as a means to engage with the world around him. Khan started to capture the intimate world around him with a camera when he was 15 years old. After achieving a BA degree in photography at the University of West England in Bristol, he moved back to London, his home town, where he assisted full-time the world-leading Swiss architectural photographer Helene Binet. Khan started shooting photos and videos freelance in 2015 and has been based at Hotel Elephant since October 2016.
His portrait based practice is a study of emotion, relationships and belonging, with his personal interest in community as a driving force in his work. Lewis’ practice is a deep exploration of the human experience with an interest in challenging conventional ways of representation - whether of youth, race, or urban environment.
In his documentary photography series 'George Town', Khan gives us a view into the life of south London resident, George. Khan says that: "During a period of my adolescence that saw playing football in the street as a daily ritual, George and myself often shared the same space. Frequently we would meet with a simple nod, more frequently a hello, and on occasion George would join in for a kick about. Georgetown is informed by six years of these impromptu and informal meetings in the street, usually the same one".
Khan cites his first foray in to moving image as ‘Georgetown’, a formative project that would go on to influence his approach to stills. The film is informed by six years of impromptu and informal meetings with local resident George, with Khan revisiting the subject over an extended period of time; an approach that he says has given his subsequent projects greater depth. The film was exhibited widely (most notably at The Photographer’s Gallery), and awarded first prize at Shuffle Film Festival by director Danny Boyle.
Portraits can be taken anywhere and often the most powerful images are taken of everyday life. From the extraordinary to the mundane all subject matters can create exciting and inspiring photographs.
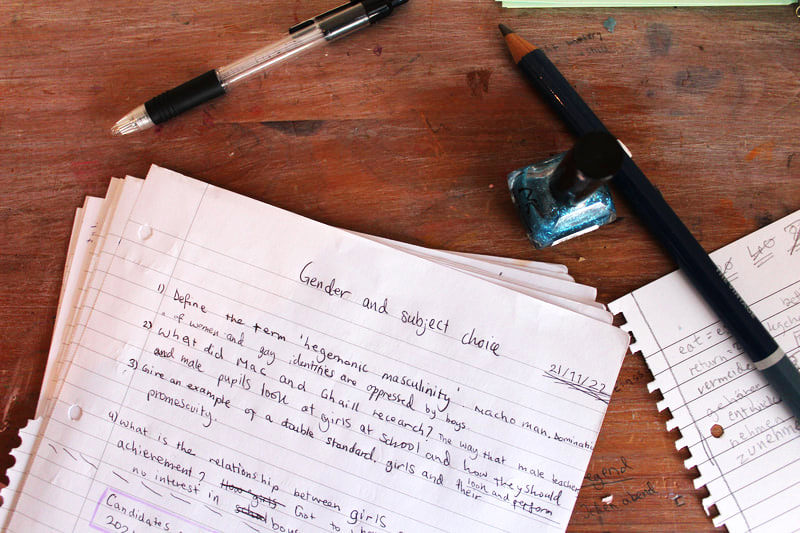
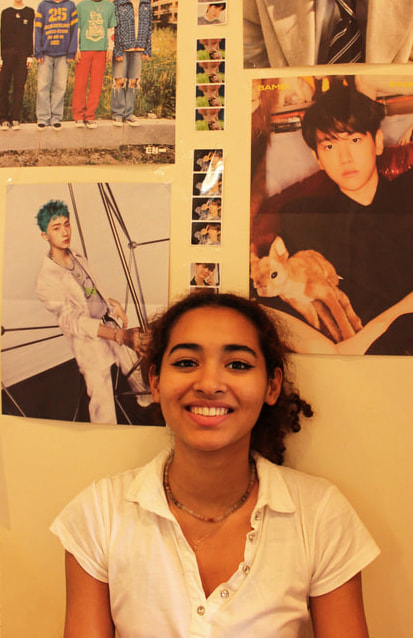
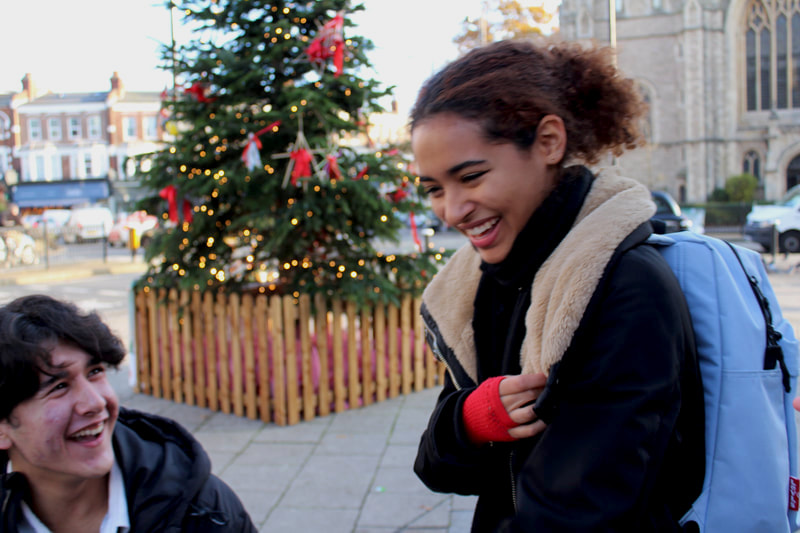
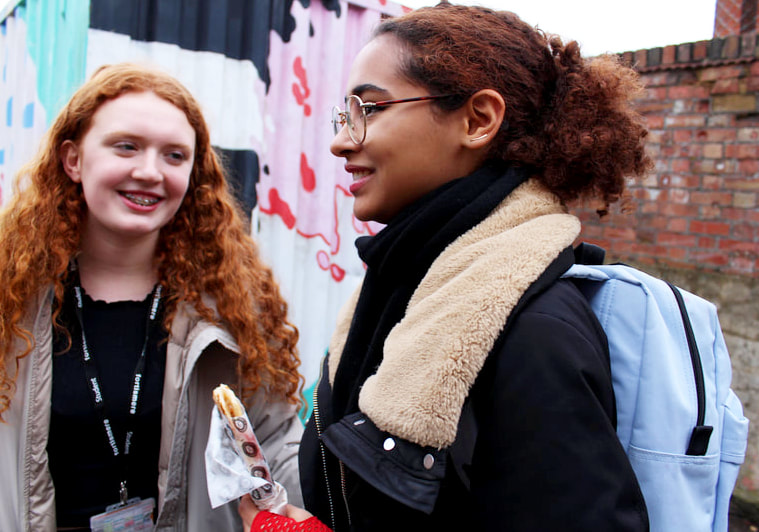
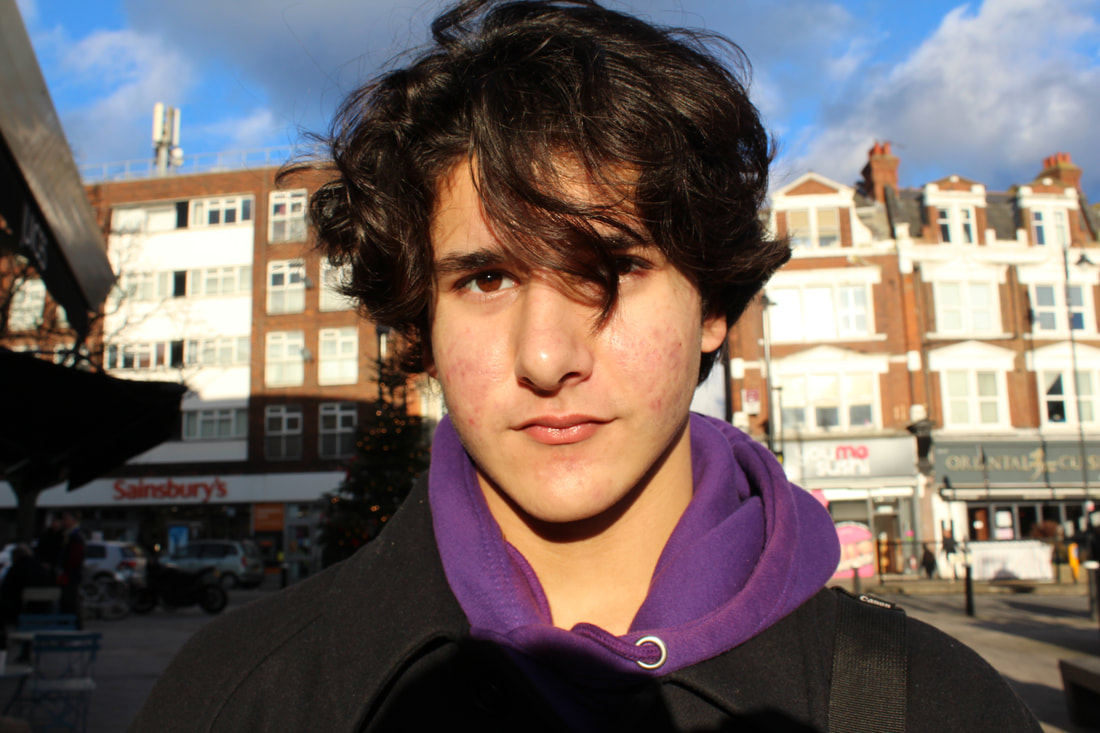
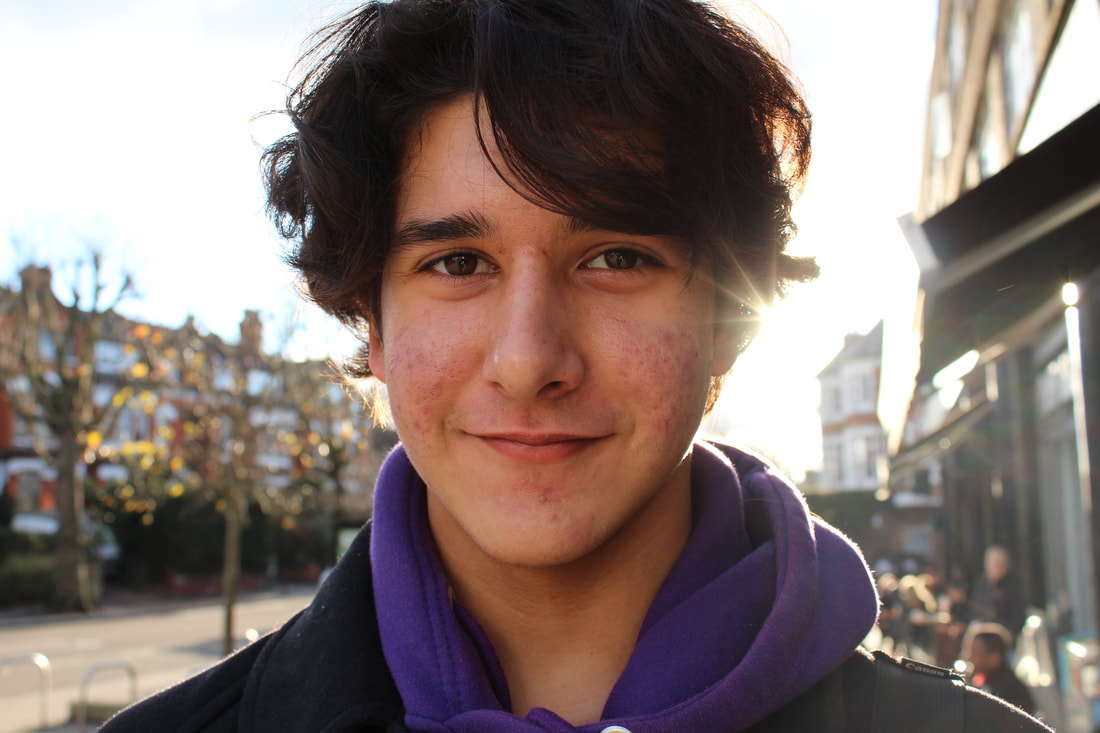
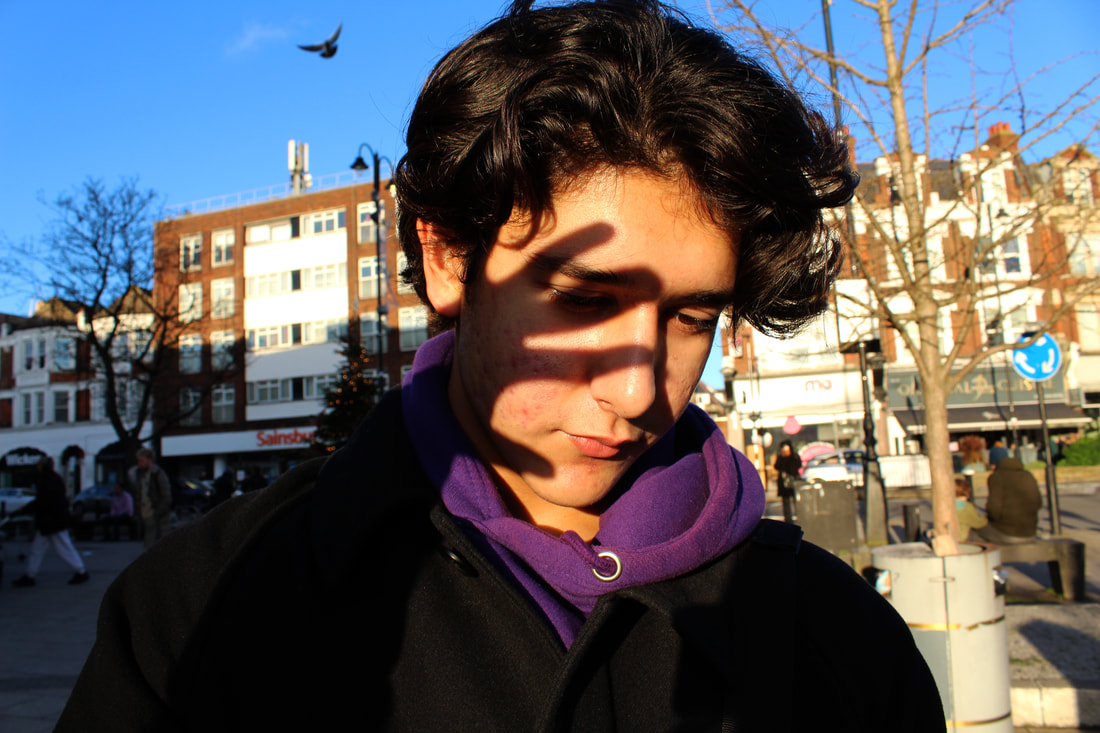
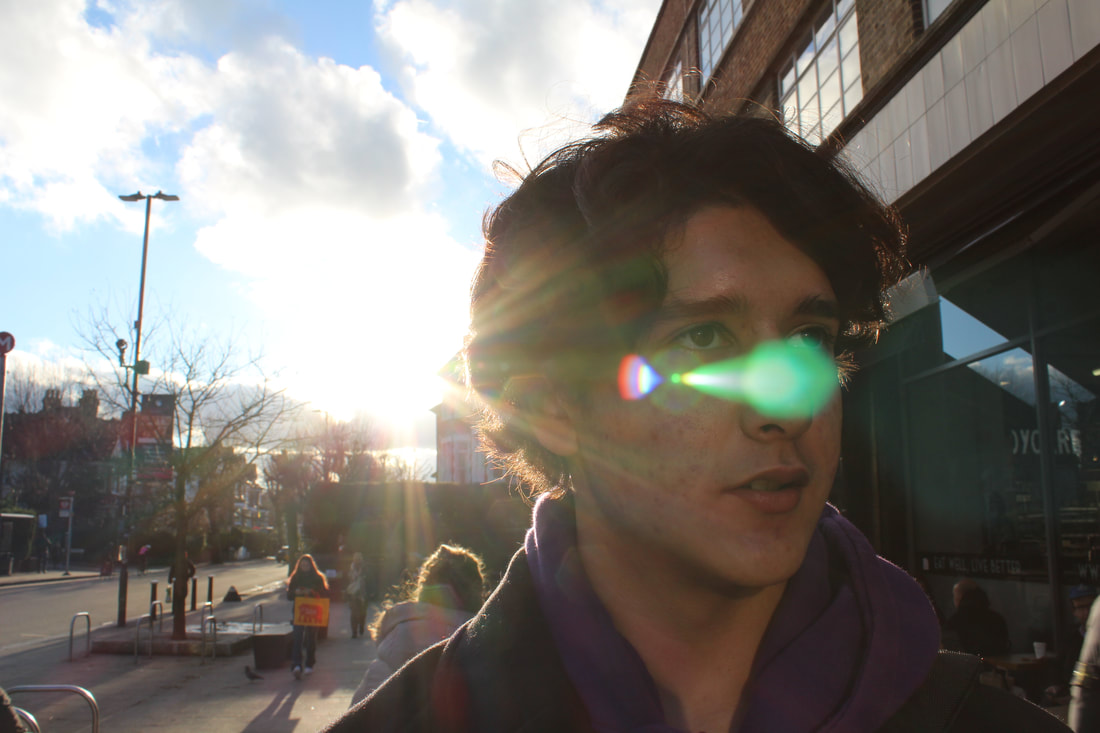
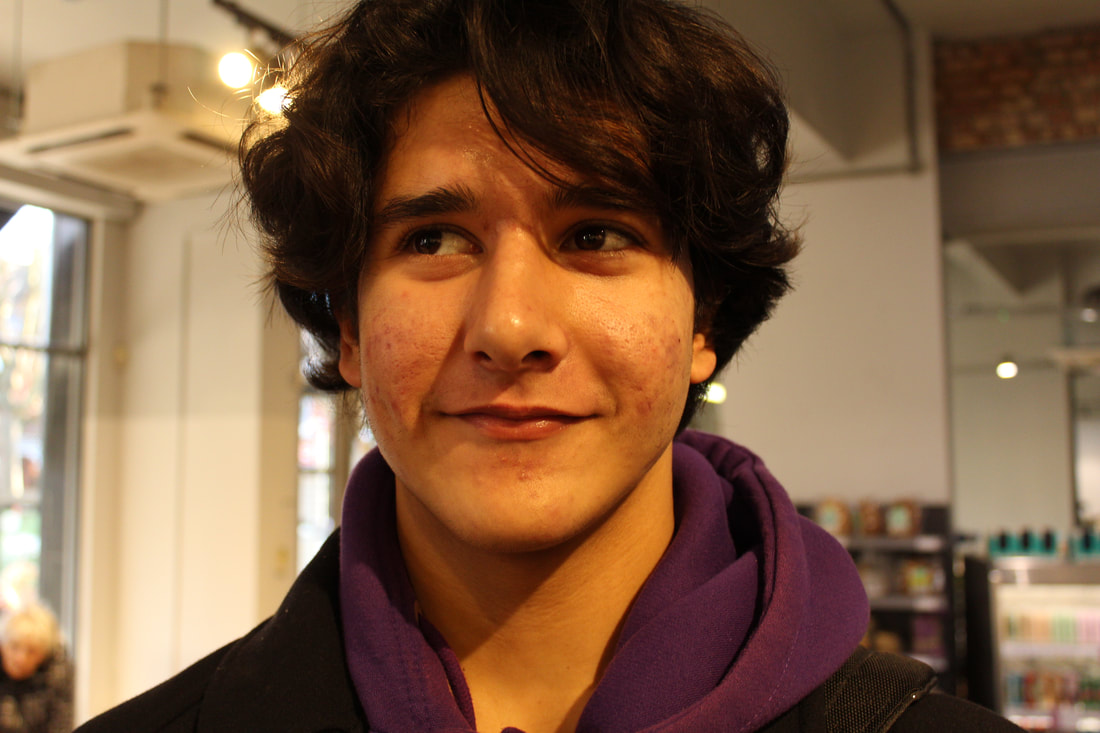
In this task, I tried to capture three different environments in which my subjects lived or worked. I photographed chosen people of particular relevance to me. I tried to capture their everyday lives and all things unique to them. In this way, I built up a visual picture of my subjects.
Edits

|
|
|
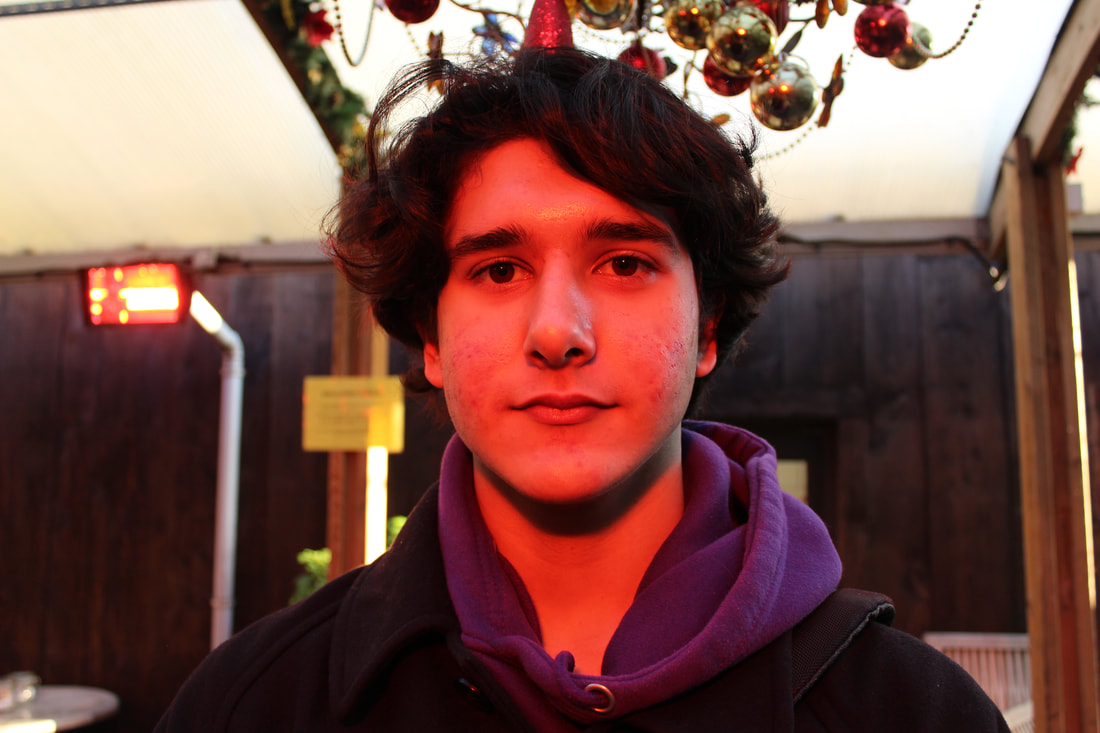
Lighting
Natural Light
To capture natural light the most successfully, it is best to shoot in manual mode, using a minimum shutter speed of around 1/100th of a second (or faster).
|
|
Tungsten Light
Tungsten light is warm, artificial light. It's usually orange or yellow. It's often found in ovens and bathrooms, as well as in lamps and street lights. Despite the fact that it exists in many places, it's something that photographer overlook very often.
|
|
Coloured lighting
|
|
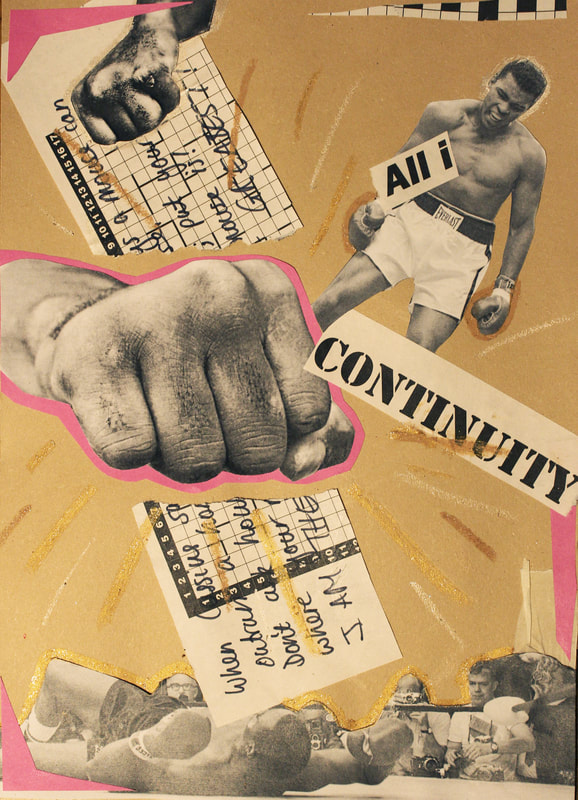
The Big Up Portrait
Big Up is an impressive array of portraits featuring rappers, actors, boxers, dancers, skateboarders, children, and other street characters. London-born photographer Ben Watts started this collection in 1990 when he came to New York from the Sydney College of Arts. Fascinated by the faces and energy of New York’s urban youth culture, the book started as a collection of personal snapshots that continued to build over a dozen years. The photographs contain sharpie notes and tape alongside other mixed media that give the images a unique stylised look.
The photographer behind the project is Ben Watts, a British-born photographer who grew up in Australia and is now based in New York City. Watts attended the Sydney College of Arts to study graphic design in 1985. He says that the up-front and technical nature of photography initially scared him but he became inspired by his first photography lecturer, after which photography became some kind of addiction for him. Watts' initial attraction to the camera in conjunction with his early discovery of hip-hop culture led him to break away from the surfing scene of Australia to the sounds and sights of New York. In 19990, he went to New York to continue exploring his new found fascination in street culture. He was interested in both the music and fashion of the hip-hop scene and found the city the concentration for the energy of urban cultures while exploring Brooklyn and down-town New York.
In 2004, Watts published 'Big Up' - this scrapbook style journal which has inspired this task. Watts uses masking tape, permanent markers, paint and quotes from the models themselves to bring together his photos, polaroids and sometimes contact sheets. Watts says that, rather than stemming from indecision, his use of the collage technique is to bring the people behind the lens visually into the picture, as well as showing another side to them. Watts also thinks that as a designer or a photographer it is very important to keep a visual journal of your work, for reference and for your 'progression or regression'.
Watts has said that he believes 'it's easier to spot things from the outside sometimes, out looking in' rather than being a participant.
My Response
For this task, I was required to create a collage based around the American professional boxer Muhammad Ali. Although most famous for heavyweight boxing prowess, Ali was also an important activist. He became a Muslim after 1961 and later in 1966, was found guilty of draft evasion owing to his religious beliefs and ethical opposition to the Vietnam War. Although he was forced to stop fighting during a period of his peak performance as an athlete, Ali still stuck to his opinions and this made him an emblem of the larger counterculture of the 1960s. Ali was also famous for using spoken word poetry, as in his poem 'I am the greatest!', which I have written the last few lines of onto some newspaper.
Independent Development
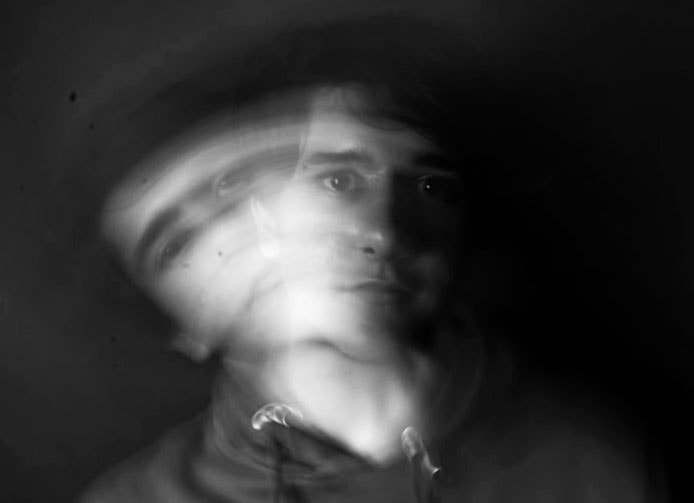
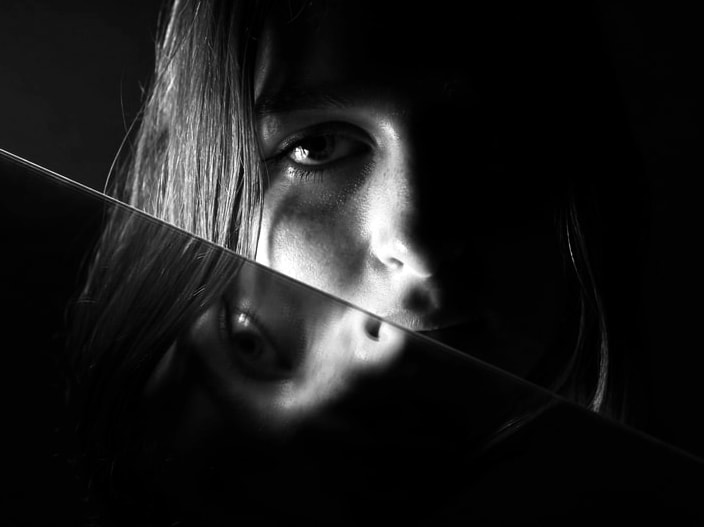
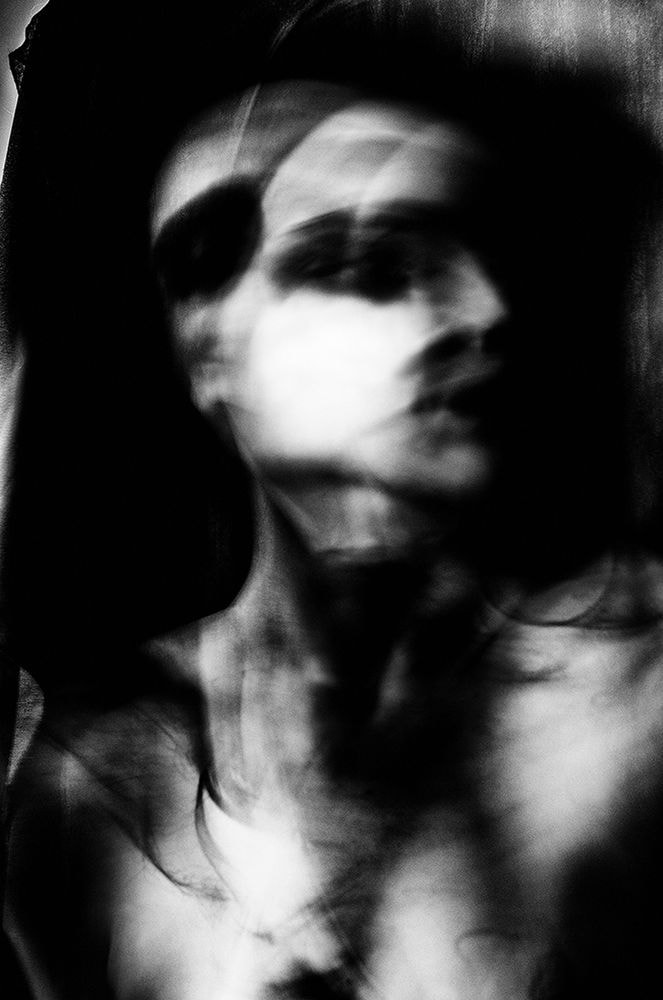
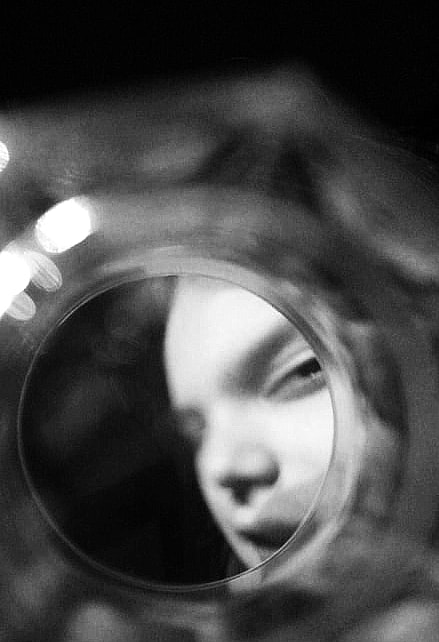
For my portraiture development project, I chose to experiment with light and shadow further through continuing to look at the work of Valerie Kabis. I want to create striking portraits by using strong artificial lighting - I will achieve this by allowing no light to enter into the room so that the only source of light will be what I am able to manipulate. By photographing my subject against a blank wall, I hope that the only thing the viewer can see is my subject's head, creating the ominous look that they are floating in an empty void. By completely isolating my subject in space in this way, I hope to rid the image of anything materially tangible to further emphasise the strangeness of the human form as well as highlight the half-obscured emotions of my subject. I aim to create a sense of the subject being simultaneously subdued as well as freed - subdued as the images will have a dark palate (as I will be editing into black and white), subdued as none of the subject's face will be clear. But is this ambiguity not freeing? It is up to the viewer to interpret what they see in the subject's emotions, there is less pressure on what the subject themselves want to convey.
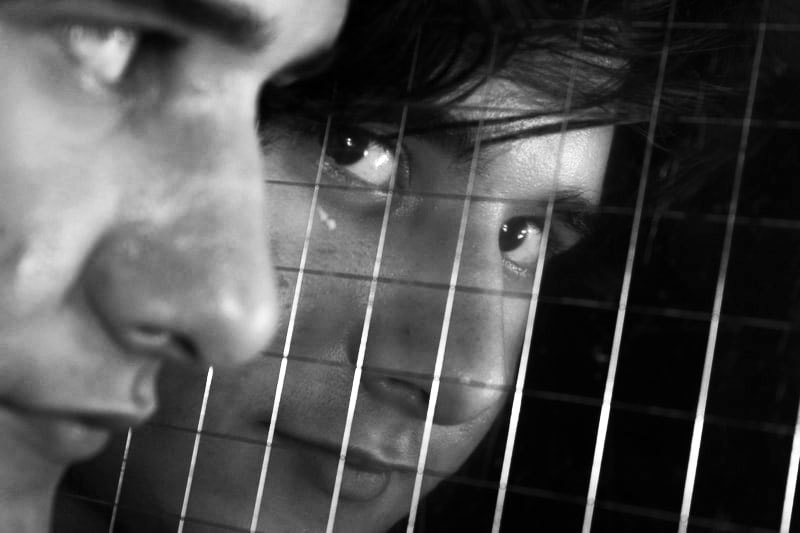
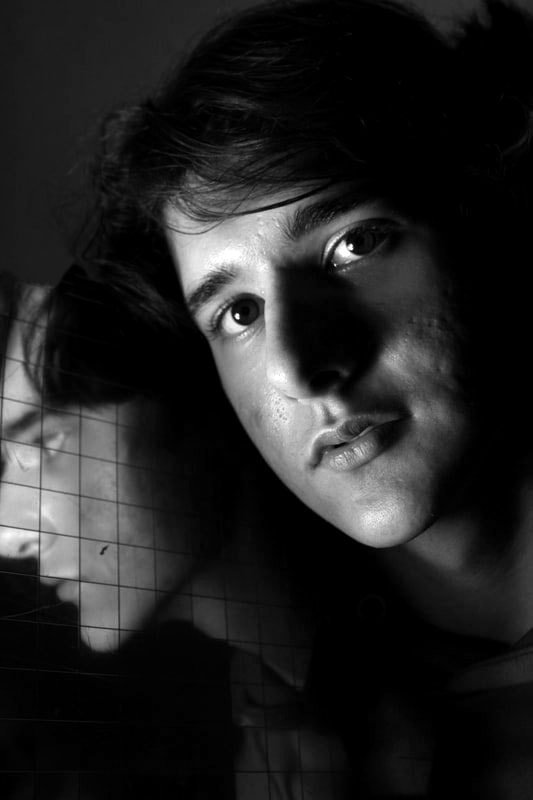
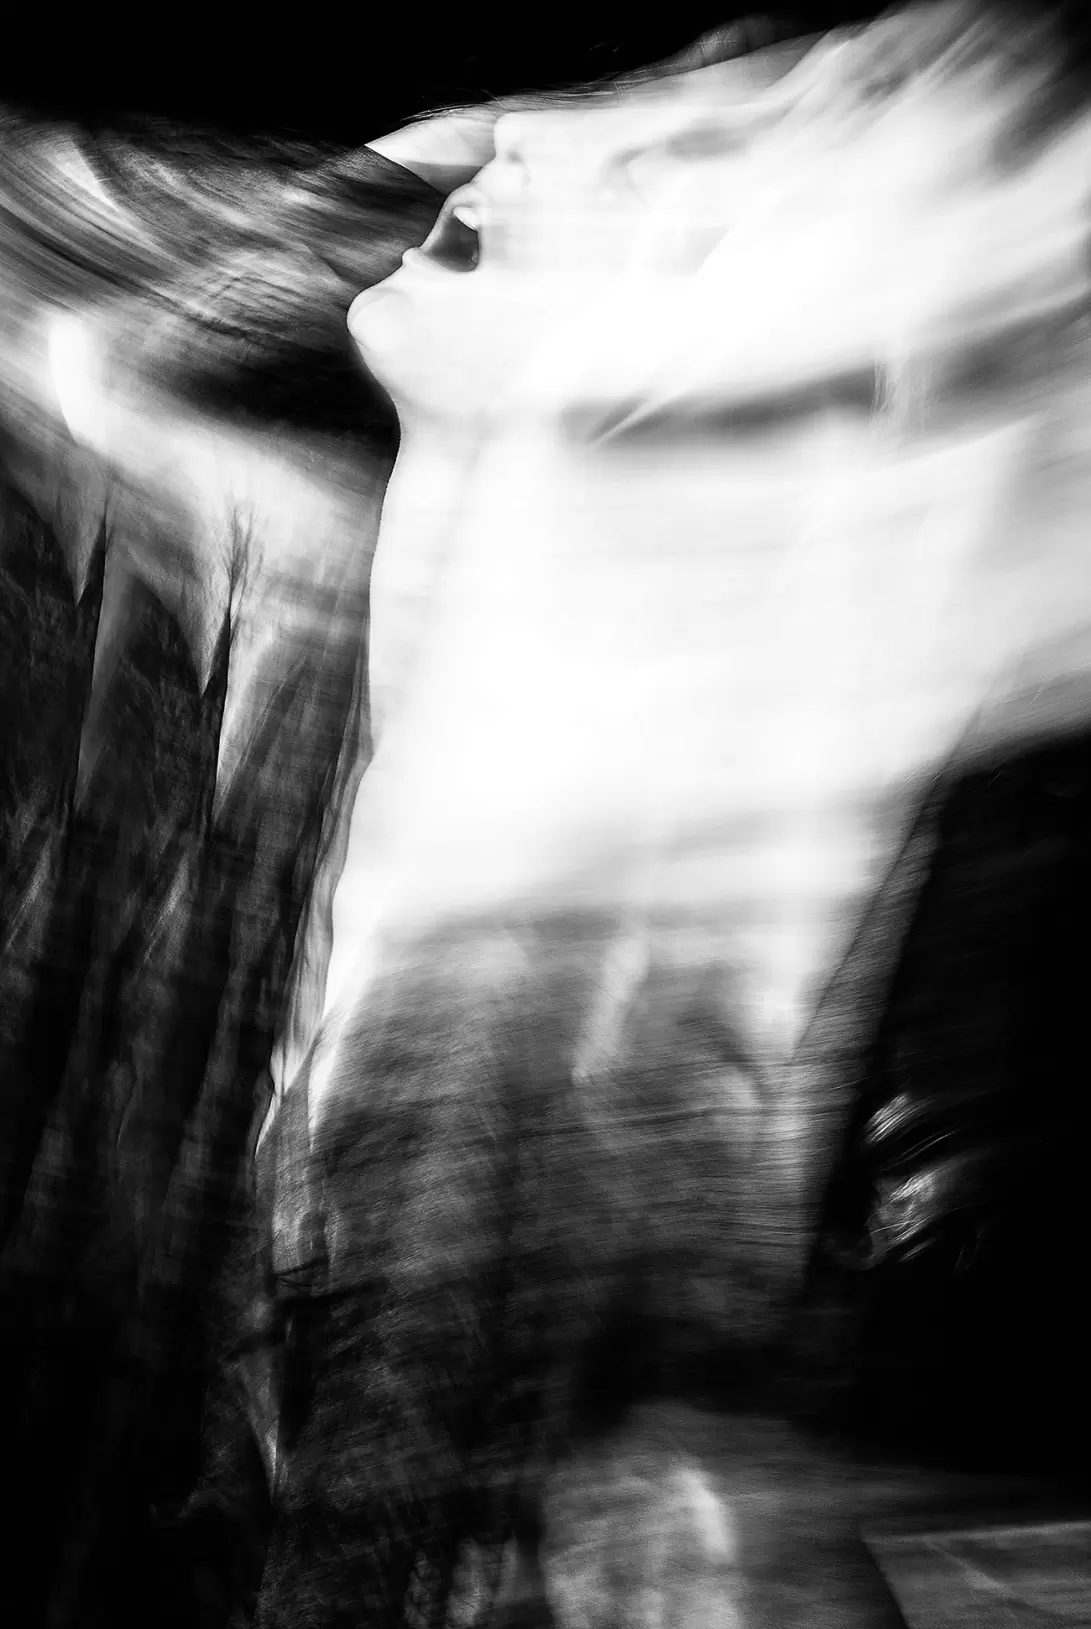
Additionally, I wish to investigate further into the surreal nature of Kabis' images. As well as experimenting with lighting, Kabis uses very slow shutter speeds to blend movements and, in some cases, to create the illusion of the subject having two heads. She also uses distortion techniques to stretch and condense faces into strange shapes. It is almost like Kabis is breaking out of the restraints of what is conventional, stepping beyond the line of physical reality in order to treat what is static and immovable as a clay, moulding from what is in its nature impossible to mould. I will try to experiment in a similar way by using mirrors to reflect certain facial features, or use two mirrors to create an angle, and using slow shutter speeds. I will also try to distort through my camera lens also - perhaps by shooting through some glass.
Additionally, I wish to investigate further into the surreal nature of Kabis' images. As well as experimenting with lighting, Kabis uses very slow shutter speeds to blend movements and, in some cases, to create the illusion of the subject having two heads. She also uses distortion techniques to stretch and condense faces into strange shapes. It is almost like Kabis is breaking out of the restraints of what is conventional, stepping beyond the line of physical reality in order to treat what is static and immovable as a clay, moulding from what is in its nature impossible to mould. I will try to experiment in a similar way by using mirrors to reflect certain facial features, or use two mirrors to create an angle, and using slow shutter speeds. I will also try to distort through my camera lens also - perhaps by shooting through some glass.
|


|
|
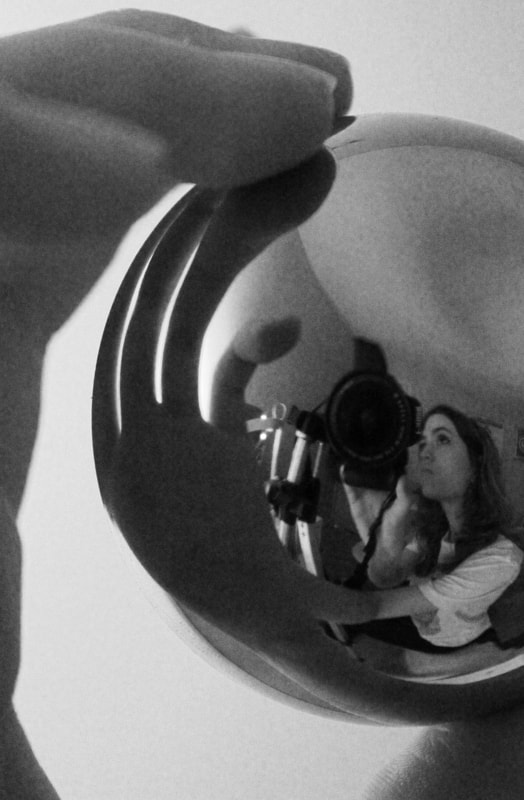
My First Response

|
|

|


I found that using the glass created an interesting, almost kaleidoscope-like effect, however it was hard to control the focus on the lens onto what I wanted. The use of long shutter speeds I found effective in giving an alien quality to the images, I think they were especially successful when I managed to get a clear face as in the photo above. I liked when the photos conveyed a sort of muffled or subdued emotion - like the subject was just about to express something.
To improve, when using a long shutter speeds I need to use a tripod to reduce the risk of any movement of my hands from blurring the images. I would also like to experiment with double exposure to add to the other-wordly look, as well as continually enhancing the expressions of my subjects - what are they thinking?
To improve, when using a long shutter speeds I need to use a tripod to reduce the risk of any movement of my hands from blurring the images. I would also like to experiment with double exposure to add to the other-wordly look, as well as continually enhancing the expressions of my subjects - what are they thinking?
My Second Response